
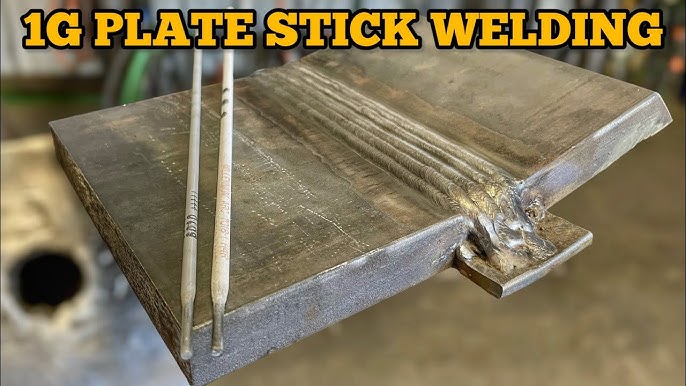
Are you ready to learn a skill that can help you fix, build, and create metal projects with confidence? Knowing how to stick weld opens up a world of possibilities, whether you’re working on a car, a fence, or a DIY project at home.
This guide will walk you through the basics step-by-step, making it easy for you to get started and see real results quickly. By the end, you’ll feel ready to take on your next welding challenge like a pro. Keep reading to discover the simple secrets behind sticking welds that hold strong and last long.
Choosing The Right Equipment
Choosing the right equipment for stick welding sets the foundation for strong and clean welds. The right tools make the process easier and safer. Understanding the types of welders, electrodes, and safety gear helps you prepare well. Proper preparation leads to better results and less frustration.
Types Of Stick Welders
Stick welders come in various types designed for different tasks. Transformer welders are heavy but reliable for thick metals. Inverter welders are lightweight and energy-efficient, ideal for home projects. Choose a welder that fits your power supply and metal thickness.
- Transformer welders: Durable, cost-effective for heavy work
- Inverter welders: Portable, efficient, good for light work
- Engine-driven welders: Used outdoors, require fuel
Selecting Electrodes
Electrodes carry the current and add filler metal to the weld. Different electrodes suit various metals and positions. Mild steel electrodes like E6013 work well for beginners. For stronger welds, use E7018 electrodes. Match electrode type to the metal for the best bond.
- E6013: Easy to use, good for thin metals
- E7018: Strong, good for structural work
- Cellulosic electrodes: Good for outdoor work
Safety Gear Essentials
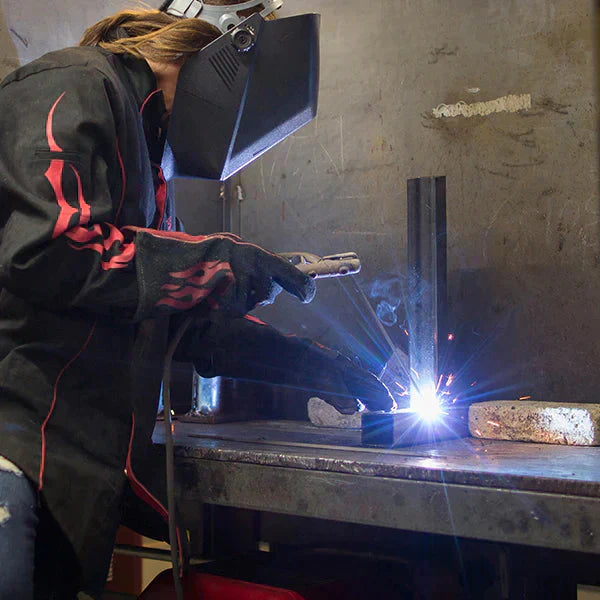
Welding produces sparks, heat, and harmful light. Safety gear protects your body and eyes. Always wear a welding helmet with a proper shade lens. Use flame-resistant gloves and a heavy jacket. Respirators protect from fumes, and steel-toed boots shield your feet.
- Welding helmet with auto-darkening lens
- Flame-resistant gloves and jacket
- Respirator or mask for fumes
- Steel-toed boots for foot safety
Credit: yeswelder.com
Preparing The Workpiece
Preparing the workpiece is a key step in stick welding. Proper preparation ensures strong welds and reduces defects. It involves cleaning, designing the joint, and stabilizing the parts. Each task helps the welding process run smoothly and safely.
Cleaning And Surface Prep
Clean the metal surface well before welding. Remove rust, paint, oil, and dirt. Use a wire brush, grinder, or chemical cleaner. A clean surface helps the electrode stick better. It also prevents weak welds and contamination.
Joint Design And Fit-up
Plan the joint shape based on the welding task. Align the pieces close together for a tight fit. Check the angle and gap between parts. Proper fit-up controls heat and weld penetration. It also avoids gaps that cause poor welds.
Positioning For Stability
Secure the workpieces firmly before welding. Use clamps, magnets, or fixtures to hold them steady. Stable parts reduce movement and improve accuracy. Proper positioning also lowers the risk of weld defects.
Setting Up The Welder
Set the welder by choosing the correct electrode and adjusting the current to match its size. Clean the metal surface to ensure a strong weld. Hold the electrode at a steady angle and maintain a consistent speed while welding.
Setting up your welder is the foundation of successful stick welding. Whether you’re a beginner or a seasoned pro, mastering this setup can make your work more efficient and enjoyable. Before diving into the sparks and heat, it’s essential to understand how to adjust the settings for optimal performance. Let’s explore the critical aspects of setting up your welder effectively.Adjusting Amperage
Finding the right amperage is like tuning a musical instrument; it ensures your welds are smooth and strong. Most welders have a dial to adjust the amperage. Consider the thickness of the metal and the electrode size. Thicker metals require higher amperage to penetrate deeply. A practical tip is to start with a lower setting and gradually increase until you find the sweet spot. Listen to the sound of the arc—steady crackling usually indicates the correct amperage. Do you hear the perfect buzz?Polarity Settings
Choosing the correct polarity can make or break your weld quality. Stick welders typically offer two polarity options: DC+ (Direct Current Electrode Positive) and DC- (Direct Current Electrode Negative). DC+ is preferred for deeper penetration, ideal for thicker materials. DC- is better for thin metals, giving a smoother finish. Your choice will depend on the project’s needs. Have you considered how polarity might impact your specific welding task?Cable And Electrode Holder Setup
The proper setup of cables and electrode holders is crucial for safety and efficiency. Ensure the cables are securely connected to the welder and the clamp is attached to the workpiece. Check for any damage or fraying—it’s about safety first! Position the electrode holder comfortably in your hand. A firm grip will give you better control. Remember, the setup should feel natural, not forced. How does your current setup feel?
Credit: www.tiktok.com
Mastering The Welding Technique
Mastering the stick welding technique requires focus and steady hands. Precision in every move ensures strong, clean welds. Small changes affect the weld quality significantly. Learn how to control the arc, electrode angle, and travel speed for better results.
Striking The Arc
Start by touching the electrode gently to the metal. Quickly lift it slightly to create the arc. Avoid sticking the electrode too long on the metal. A smooth arc strike prevents damage and sparks. Practice this action until it feels natural.
Maintaining Arc Length
Keep the arc length short and consistent. Ideal arc length equals the diameter of the electrode. Too long an arc causes spatter and weak welds. Too short an arc can stick and interrupt the weld. Watch the arc closely to keep it steady.
Controlling Travel Speed
Move the electrode at a steady pace. Too fast travel leaves gaps and weak joints. Too slow travel creates excessive weld build-up. Find a speed that forms a smooth, even bead. Adjust speed based on metal thickness and electrode type.
Managing Electrode Angle
Hold the electrode at a 10 to 15-degree angle from vertical. This angle directs the molten metal properly. Too steep or flat angles cause poor penetration or slag. Maintain the angle steady through the weld. Good control improves bead shape and strength.
Common Challenges And Fixes
Sticking with stick welding can be tricky, especially when common problems pop up. These challenges can affect the strength and appearance of your welds. Knowing how to spot and fix these issues will help you get better results and avoid frustration.
Porosity Issues
Porosity happens when gas gets trapped in the weld metal, creating tiny holes. This weakens your weld and can cause leaks or breaks. It often occurs because of dirty metal, damp electrodes, or poor shielding.
To fix porosity, clean your workpiece thoroughly before welding. Make sure your electrodes are dry—store them in a rod oven if you can. Also, keep a steady, appropriate arc length to maintain good shielding from the electrode coating.
Cracking Prevention
Cracks can ruin a weld, making it unsafe or unusable. They often happen due to rapid cooling, high stress, or incorrect welding technique. Have you noticed cracks forming when you stop welding suddenly or change directions?
To prevent cracking, control the cooling rate by preheating thick materials. Use proper welding speed and avoid starting or stopping on the edge of a joint. Also, choose the right electrode for the metal type and thickness to reduce stress.
Avoiding Slag Inclusion
Slag inclusion means bits of the electrode coating get trapped inside the weld. This creates weak spots that can cause failure later. It usually happens if you don’t clean the weld between passes or use the wrong angle.
Make sure to chip away all slag after each pass before continuing. Hold your electrode at the correct angle—usually around 75 to 85 degrees—to let slag float to the surface. Keeping a steady hand and consistent speed also helps prevent slag from sticking inside.

Credit: www.youtube.com
Post-weld Practices
Post-weld practices are crucial for strong, clean, and lasting stick welds. They help remove impurities and prevent issues that weaken the weld. Proper care after welding improves the joint’s durability and appearance. Below are essential steps to follow once the welding is done.
Slag Removal Tips
Slag forms on top of the weld bead and must be removed. Use a chipping hammer to gently chip away the slag. Avoid hitting the weld itself to prevent damage. After chipping, brush the area with a wire brush to clear any leftover debris. Clean welds show the true quality of your work and prepare the surface for additional welding or finishing.
Inspection For Defects
Check the weld for cracks, porosity, or undercut. Look closely at the weld bead shape and consistency. Small defects can lead to bigger problems later. Use visual inspection and touch to detect flaws. Mark any defects and decide if repair is needed. Early detection saves time and ensures safety.
Proper Cooling Methods
Let the weld cool slowly and naturally. Rapid cooling can cause cracks or warping. Avoid spraying water or using fans directly on the weld. For thick materials, consider covering the weld with insulating blankets. Controlled cooling helps maintain the weld’s strength and prevents stress in the metal.
Advanced Tips For Consistency
Consistency in stick welding separates an average weld from a professional one. Achieving uniform welds requires more than just steady hands; it demands adapting to different challenges and maintaining your tools properly. Below are some advanced tips to help you keep your welds consistent regardless of the situation.
Welding In Different Positions
Welding flat is straightforward, but vertical, overhead, or horizontal positions test your control. Gravity affects the molten metal differently in each position, so adjusting your angle and speed is crucial.
When welding overhead, try to keep a tighter arc length to prevent drips and uneven beads. Moving slowly and deliberately helps avoid sagging welds. Have you noticed how a slight change in electrode angle can improve bead shape dramatically?
Dealing With Various Metals
Each metal reacts uniquely to heat. Steel, stainless steel, and cast iron all require different amperage settings and electrode choices.
For example, stainless steel needs less heat to avoid warping, so lower your amperage and use a faster travel speed. With cast iron, preheating the metal before welding reduces cracks. Understanding these differences lets you tailor your approach for consistent results.
Maintaining Equipment
Your equipment’s condition directly impacts weld quality. Dirty or worn electrodes cause spatter and poor fusion.
- Check and clean your electrode holder regularly to ensure a strong connection.
- Replace cables showing wear to avoid voltage drops.
- Inspect your welding machine for proper calibration to maintain steady current.
When was the last time you gave your gear a thorough check? Small maintenance habits save time and improve every weld you make.
Frequently Asked Questions
What Is Stick Welding And How Does It Work?
Stick welding, or Shielded Metal Arc Welding (SMAW), uses a consumable electrode to join metals. The electrode melts, creating a weld pool and protective slag. This method is versatile, suitable for various metals and outdoor conditions.
What Safety Gear Is Essential For Stick Welding?
Essential safety gear includes a welding helmet with a proper filter lens, flame-resistant gloves, long sleeves, and protective boots. Respirators and ear protection may be necessary to prevent inhaling fumes and protect against sparks.
How Do You Prepare Metal Before Stick Welding?
Clean metal surfaces by removing rust, paint, and oil. Use a wire brush or grinder to ensure a smooth base. Proper preparation ensures better weld quality and stronger joints.
What Settings Are Best For Stick Welding Beginners?
Start with a lower amperage suitable for the electrode size, usually 70-90 amps for 1/8-inch rods. Use a 6013 electrode for easy arc striking and stable welds. Practice steady hand movements for consistent results.
Conclusion
Stick welding requires practice and patience to get right. Start with clean metal and steady hands. Use the correct settings for your welder. Watch your arc length and travel speed carefully. Keep safety gear on at all times. Small mistakes can cause weak welds or splatter.
Keep learning and trying different techniques. Over time, your welds will look cleaner and stronger. Stick welding can be a useful skill for many projects. Remember, practice makes progress, not perfection.
About The Author

