
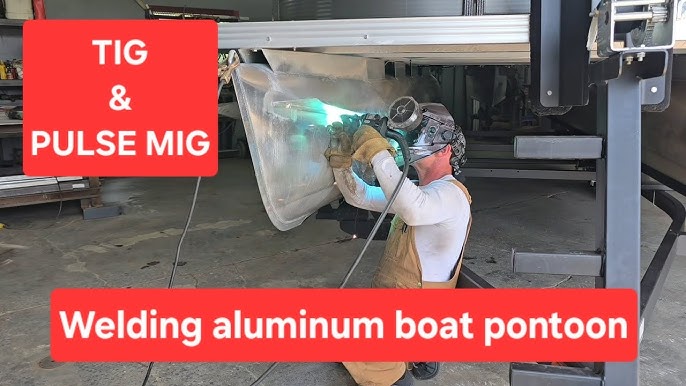
Are you ready to master the art of TIG welding aluminum? Whether you’re a beginner or looking to sharpen your skills, understanding how to weld aluminum with precision can open up a world of possibilities.
Aluminum is lightweight, strong, and versatile—but welding it requires a different approach than other metals. In this guide, you’ll discover simple, clear steps to help you achieve clean, strong welds every time. Keep reading, and you’ll learn the secrets that make TIG welding aluminum both easier and more effective than you might think.
Your next project deserves the best weld, and this is where it starts.
Essential Tools And Equipment
Having the right tools is key to TIG welding aluminum successfully. The equipment must fit the metal’s unique needs. This section covers the essential gear needed for clean, strong welds. Proper tools help control heat and avoid common problems with aluminum welding.
Tig Welder Selection
Choose a TIG welder with AC capability. Aluminum needs alternating current to clean the oxide layer. Look for a machine with adjustable amperage. Precise control helps prevent warping or burning through the metal. A high-frequency start feature is useful for easy arc ignition. Water-cooled torches manage heat better during long welds.
Choosing The Right Electrodes
Tungsten electrodes must be pure or zirconiated for aluminum. Pure tungsten offers a stable arc but wears quickly. Zirconiated tungsten lasts longer and works well with AC. Use a 2.4mm diameter for most aluminum thicknesses. Grind the tungsten to a pointed tip for better arc focus. Keep the electrode clean to avoid contamination and poor weld quality.
Protective Gear And Safety Equipment
Wear a welding helmet with a shade of 10 to 13 to protect your eyes. Use flame-resistant gloves and long sleeves to guard your skin. Respirators help avoid breathing harmful aluminum fumes. Ensure proper ventilation in your workspace. Keep a fire extinguisher nearby for quick response to sparks or flames.

Credit: www.youtube.com
Preparation Steps
Preparing to TIG weld aluminum is crucial for a strong, clean weld. Proper preparation helps avoid weld defects and ensures a smooth process. Focus on three key areas: cleaning, workspace setup, and machine settings.
Cleaning The Aluminum Surface
Aluminum must be clean before welding. Dirt, oil, and oxide layers can ruin the weld. Use a stainless steel brush dedicated only to aluminum. Brush the surface in one direction to remove oxide.
Wipe the metal with a clean cloth and acetone or a similar solvent. Avoid touching the clean surface with bare hands. Keep the surface free of dust and grease.
Setting Up The Work Area
Choose a well-ventilated, well-lit space. Remove any flammable materials nearby. Arrange your tools and materials within easy reach.
Secure the aluminum piece firmly using clamps or a welding table. This prevents movement during welding. Keep your welding helmet and gloves nearby for safety.
Adjusting The Tig Welder Settings
Set the TIG welder to AC mode for aluminum. Adjust the amperage according to the metal thickness. Use a pulse setting if available to control heat.
Select a tungsten electrode with a 2% thoriated or lanthanated tip. Sharpen it to a fine point for better arc control. Set the gas flow rate to 15-20 cubic feet per hour.
Techniques For Tig Welding Aluminum
TIG welding aluminum requires specific techniques to ensure strong, clean welds. Aluminum reacts quickly to heat, so controlling the process is key. Using the right tools and methods helps prevent common problems like warping or weak joints. Focus on three main areas to improve your welding: heat input, filler rods, and torch movement.
Controlling Heat Input
Heat control is crucial for welding aluminum. Too much heat can cause burn-through or warping. Too little heat results in poor fusion. Use a low amperage setting and increase gradually. Keep the weld pool small and steady. Use a foot pedal or fingertip control for better heat adjustment.
Using Filler Rods Effectively
Choose the correct filler rod for the aluminum alloy you are welding. Match the rod diameter to the material thickness. Add the filler rod smoothly into the weld pool. Avoid adding too much at once to prevent defects. Keep the rod at an angle, feeding it steadily with consistent speed.
Mastering Torch Movement
Move the torch in a steady, controlled manner. Use a slight circular or weaving motion to cover the weld area evenly. Maintain a consistent distance between the torch and the workpiece. Avoid staying too long in one spot to prevent overheating. Practice smooth, fluid movements for better weld appearance and strength.

Credit: www.eastwood.com
Common Challenges And Solutions
Tig welding aluminum can be tricky, especially if you’re not ready for the common challenges that come with it. Understanding these hurdles and knowing how to tackle them will improve your weld quality and save you time and frustration. Let’s look at some frequent issues and practical solutions you can apply right away.
Dealing With Warping
Aluminum is prone to warping because it heats up and cools down quickly. This can distort your workpiece, ruining the fit and finish. To control warping, try using tack welds at intervals to hold the metal in place.
Also, reduce heat input by lowering your amperage or using a faster travel speed. You can clamp the aluminum securely to a heavy, heat-resistant surface to help keep it flat. Have you noticed how slower, steady movements help keep the metal stable?
Avoiding Contamination
Aluminum’s oxide layer melts at a much higher temperature than the base metal, which can lead to poor weld quality if not cleaned properly. Always clean the surface with a stainless steel brush or a chemical cleaner right before welding.
Use pure argon gas as your shielding gas to prevent airborne contamination. Contamination can cause porosity and weak welds—have you ever experienced tiny holes or rough spots after welding aluminum? That’s usually a sign your metal wasn’t clean.
Preventing Cracks
Cracks can form due to rapid cooling or impurities in the weld. To avoid this, preheat thicker sections of aluminum slightly before welding to slow down the cooling rate. This reduces stress in the weld zone.
Use filler rods that match the base metal alloy to keep the weld strong and uniform. Pay close attention to your welding speed and bead size; too big a bead can trap stress and cause cracking later. What steps do you take to ensure your welds stay crack-free?
Tips For Beginners
TIG welding aluminum can be challenging for beginners. It requires patience and careful practice. Following some simple tips helps build confidence and skill. Understanding the metal and keeping equipment in good shape improves results. Here are key points to focus on while starting out.
Practicing With Scrap Material
Start by welding scrap aluminum pieces. This lets you practice without pressure. Try different settings to see how the metal reacts. Focus on steady hand movements and consistent speed. Repeat until your welds look clean and even. Use scrap to test filler rods and gas flow too.
Understanding Aluminum Alloys
Aluminum comes in many types called alloys. Each alloy behaves differently when welded. Some need higher heat, others require slower cooling. Learn which alloy you are working with first. Check manufacturer details for welding tips. Knowing this prevents cracking and weak welds.
Maintaining Equipment
Clean and check your TIG welder before every use. Replace worn-out tungsten tips for better arc control. Make sure your gas cylinder is full and regulator works well. Clean the torch and check hoses for leaks. Good equipment keeps your welds strong and neat.
Advanced Techniques
Mastering TIG welding aluminum requires more than just basic skills. Advanced techniques help you handle challenging projects with precision and control. These methods improve weld quality and expand your ability to work with different aluminum types and thicknesses.
Pulse Welding For Thin Aluminum
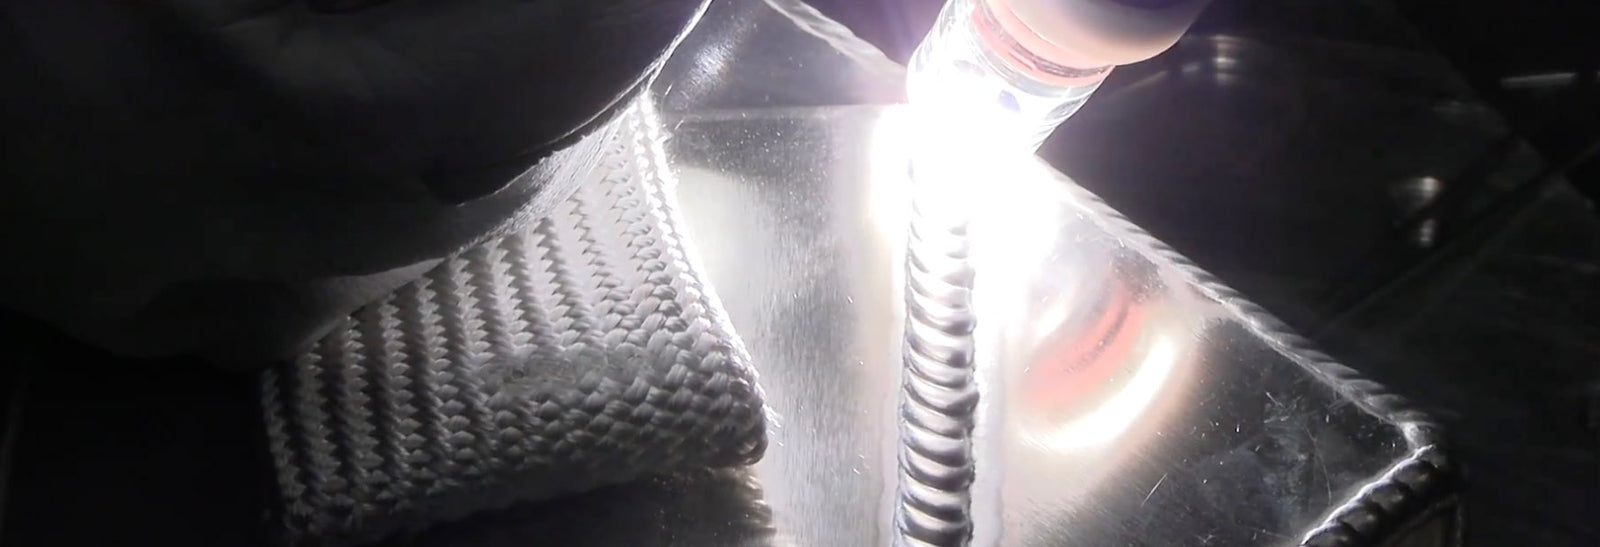
Pulsing the current allows you to control heat input very precisely, which is crucial for thin aluminum sheets. Instead of a steady flow, the current rapidly switches between high and low levels, reducing the risk of burn-through.
This technique also helps in managing distortion and achieving a cleaner weld bead. Have you noticed how thin aluminum often warps? Pulse welding can significantly reduce that problem by letting the metal cool slightly between pulses.
Using A Foot Pedal For Control
A foot pedal gives you real-time control over the welding current, allowing you to adjust heat without stopping your work. This makes it easier to respond to changes in the weld pool or material thickness instantly.
For example, if you encounter a thicker section or a joint area, you can increase heat smoothly. When moving over thinner parts, you can reduce the current to avoid melting through. This hands-free adjustment keeps your focus on the weld quality and bead shape.
Welding Aluminum Castings
Aluminum castings often contain impurities and have different heat conductivity compared to rolled aluminum, making them tricky to weld. You should clean the casting thoroughly and use a filler rod compatible with the alloy to ensure a strong bond.
Preheating the casting slightly can prevent cracking by reducing thermal stress. Have you tried welding castings without preheating? The results often include cracks or weak spots. Proper technique and patience here will save you from costly repairs later.
Credit: weldmongerstore.com
Frequently Asked Questions
What Is The Best Tig Welding Technique For Aluminum?
The best TIG welding technique for aluminum uses AC current with a high-frequency start. Clean the aluminum thoroughly to remove oxide. Use a balance control to optimize penetration and cleaning action. Maintain a steady hand and consistent speed for smooth welds.
How Do You Prepare Aluminum For Tig Welding?
To prepare aluminum for TIG welding, clean the surface with a stainless steel brush or chemical cleaner. Remove all dirt, oil, and oxide layer for better arc stability. Proper preparation prevents contamination and ensures strong, clean welds.
What Type Of Filler Rod Is Used For Aluminum Tig Welding?
ER4043 and ER5356 are common filler rods for aluminum TIG welding. ER4043 offers good flow and corrosion resistance. ER5356 provides higher strength and better color match. Choose filler rods based on the aluminum alloy and welding application.
Why Is Ac Current Used For Tig Welding Aluminum?
AC current is used because it removes the oxide layer on aluminum during welding. The alternating current cleans the surface and provides stable arc conditions. This results in better weld penetration and stronger bonds.
Conclusion
TIG welding aluminum needs patience and steady hands. Clean the metal well before starting. Use the right settings on your welder. Keep a consistent speed while feeding the filler rod. Watch the weld pool closely to avoid mistakes. Practice often to improve your skills.
Safety gear is a must every time. With care, your aluminum welds will be strong and smooth. Keep learning and trying to get better. Welding aluminum can be simple with the right steps.
About The Author

