
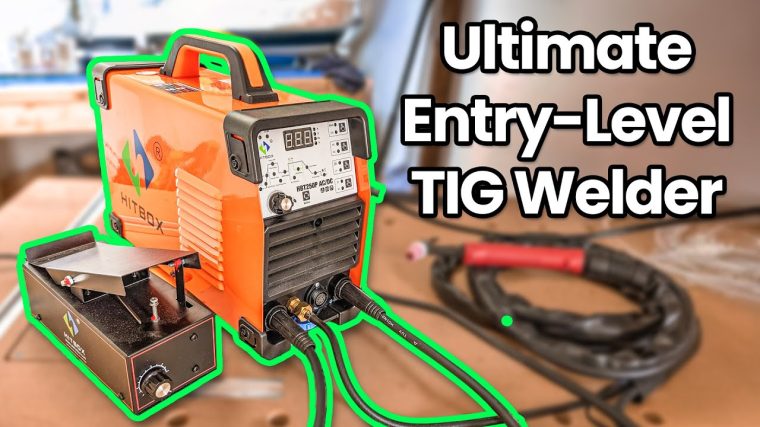
If you’re ready to take your welding skills to the next level, setting up a TIG welder is the perfect place to start. But if you’ve never done it before, the process might seem complicated or even intimidating.
Don’t worry—this guide will walk you through every step clearly and simply. By the end, you’ll have your TIG welder ready to produce clean, precise welds that you can be proud of. Keep reading to discover the easy setup tips that will save you time and frustration, so you can focus on creating strong, professional-quality welds.

Credit: www.youtube.com
Choosing The Right Tig Welder
Choosing the right TIG welder is key for a smooth welding experience. The right machine improves quality and saves time. Many options exist, each made for different skill levels and projects. Understanding your needs helps pick the best one.
Power Source and OutputCheck the power source type: AC, DC, or both. AC suits aluminum welding well. DC works great for steel and stainless steel. Output amperage defines the thickness you can weld. Higher amps handle thicker materials easily.
Welder Size and PortabilityConsider where you will weld. Small, lightweight welders suit home use or small jobs. Larger welders fit heavy-duty, industrial work. Portable models make fieldwork easier and save space.
Control Features and SettingsLook for simple controls if you are a beginner. Advanced welders offer adjustable pulse, frequency, and gas flow settings. These features enhance control and weld quality for experts.
Duty Cycle and CoolingDuty cycle shows how long the welder runs before resting. A high duty cycle means longer welding without breaks. Cooling systems prevent overheating, protecting the machine and user.
Price and WarrantySet a budget before choosing a TIG welder. Balance price with features and quality. A good warranty offers peace of mind and protects your investment.
Essential Tools And Equipment
Setting up a TIG welder requires more than just the machine itself. Having the right tools and equipment will make your welding experience safer, smoother, and more efficient. Let’s break down the essentials you need to get started and what each item contributes to the process.
Protective Gear
Your safety depends heavily on the protective gear you choose. TIG welding produces intense light and sparks that can cause serious injuries if you’re not properly protected.
- Welding Helmet:Look for a helmet with an auto-darkening feature to protect your eyes from harmful UV rays and bright arc flashes.
- Gloves:Use heat-resistant, flexible gloves designed specifically for TIG welding to maintain dexterity while shielding your hands.
- Protective Clothing:Wear flame-resistant jackets or long-sleeve shirts made from durable materials like leather or heavy cotton to shield your skin.
- Safety Glasses:Always wear safety glasses under your helmet for an extra layer of protection against flying debris.
Have you ever underestimated the importance of protective gear and ended up with a painful burn? Trust me, investing in the right equipment pays off in both comfort and safety.
Tig Welding Accessories
Beyond the basics, several accessories help you control the welding process and improve quality. These tools can enhance your precision and make your work more enjoyable.
- Tungsten Electrodes:These are essential for creating the arc. Different types like pure tungsten or thoriated tungsten suit various materials and welding conditions.
- Filler Rods:Choose filler rods compatible with the metal you’re welding to ensure strong joints.
- Gas Regulator and Flowmeter:These control the flow of shielding gas, usually argon, which prevents contamination during welding.
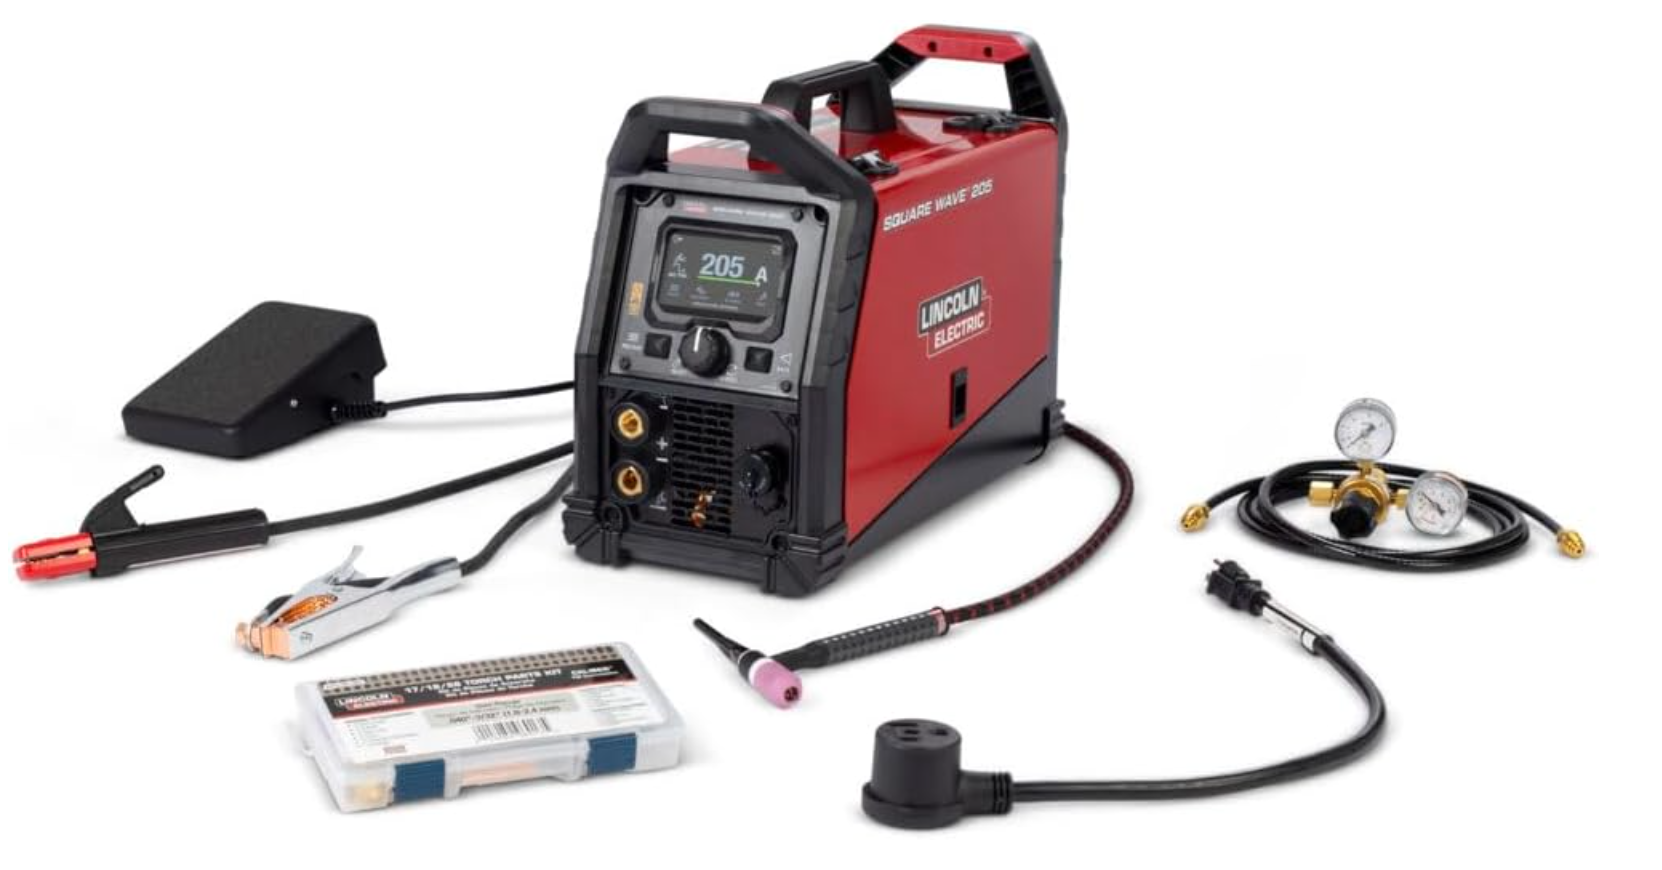
- Foot Pedal or Hand Control:Allows you to adjust the amperage while welding, giving you better control over the heat input.
- Clamps and Fixtures:Secure your workpieces firmly to maintain alignment and reduce movement during welding.
Think about how much easier your welding will be when you have precise control over the heat and gas flow. Do you have all the accessories that can make your setup truly efficient?
Understanding Tig Welding Components
Understanding the essential components of a TIG welder helps you set up your machine with confidence and accuracy. Each part plays a specific role in delivering clean, precise welds. Knowing how these components work together lets you troubleshoot issues and improve your welding quality.
Power Source
The power source is the heart of your TIG welder. It controls the electrical current that melts the metal. You’ll find two main types: AC (alternating current) for aluminum and magnesium, and DC (direct current) for steel and stainless steel.
Choosing the right power source affects weld quality. I once used an AC setup on steel and ended up with poor penetration—switching to DC fixed that instantly. Think about the metals you’ll weld most often before picking your power source.
Torch And Electrode
The torch holds the tungsten electrode and directs the arc to the metal. Tungsten is crucial because it doesn’t melt easily, maintaining a steady arc. Different tungsten types and sizes suit various metals and welding currents.
Your torch setup also includes the gas nozzle, which directs shielding gas to protect the weld from contamination. I learned that using the wrong nozzle size caused inconsistent gas flow, leading to porosity in welds. Check your torch setup carefully to avoid this.
Foot Pedal
The foot pedal lets you control the welding current while you work. This hands-free control is vital for making smooth starts and stops in the weld bead. Adjusting current on the fly helps you handle tricky welds with precision.
If you haven’t used a foot pedal before, you might underestimate its value. I found that mastering the pedal improved my weld consistency and reduced spatter. Ask yourself: how often do you need to adjust heat while welding? If often, a foot pedal is a game-changer.
Setting Up The Welding Area
Setting up the welding area correctly is important for safety and quality. A clean, organized space helps you work faster and avoid accidents. Preparing the area also protects others nearby from sparks and fumes.
Ventilation
Good airflow removes harmful gases from the welding area. Place your setup near windows or doors for fresh air. Use fans or exhaust systems to push fumes outside. Avoid welding in small, closed rooms without ventilation. Proper airflow keeps you safe and improves weld quality.
Work Surface
Choose a flat, sturdy surface to work on. Metal tables with fireproof tops work best. Clear the table of anything flammable or cluttered. Keep tools and materials within easy reach. A solid work surface helps control the welding torch and makes your welds cleaner.
Preparing The Metal Workpiece
Preparing the metal workpiece is a crucial step before you start welding with your TIG welder. The quality of your weld depends heavily on how well the metal surface is prepared and secured. Neglecting this can lead to weak joints, contamination, or even damage to your equipment.
Cleaning The Surface
Before welding, the metal must be free from dirt, rust, oil, and paint. These contaminants can cause poor weld quality or prevent the weld from bonding properly. Use a wire brush, grinder, or chemical cleaner designed for your metal type to remove any impurities.
Pay special attention to corners and edges where debris tends to accumulate. Have you noticed how a small patch of rust can cause the entire weld to fail? Cleaning ensures a smooth, solid surface that lets your welder do its job efficiently.
Securing The Metal
Once your metal is clean, it’s essential to hold it firmly in place. Movement during welding can cause misalignment or weak joints. Use clamps, magnets, or a welding table to keep your pieces stable.
Think about the last time you tried to weld without securing the workpiece—did the pieces shift and ruin your weld? Proper securing not only improves safety but also helps you maintain precise control over the weld bead.
Adjusting The Tig Welder Settings
Adjusting the TIG welder settings is a crucial step to ensure clean, strong welds. Each setting affects the arc stability, heat input, and overall weld quality. Taking the time to fine-tune these parameters can save you hours of rework and frustration.
Selecting The Right Amperage
Your amperage setting controls the heat output of the welder. Too low, and the arc won’t melt the metal properly; too high, and you risk burning through the workpiece.
Think about the thickness of the metal you’re welding. For thin metals around 1/16 inch, set the amperage between 30-50 amps. For thicker metals, increase it accordingly—around 100 amps for 1/4 inch steel is a good starting point.
Adjust in small increments and watch how the weld puddle reacts. If the arc is too aggressive or the metal warps, dial the amperage down. Are you noticing inconsistent weld beads? Tweaking amperage might be the key.
Setting The Gas Flow
The gas flow shields the weld from contamination, so getting this right is vital. Too little flow and your weld may have porosity; too much flow and you waste gas and cause turbulence.
Most TIG welders require a flow rate between 15-20 cubic feet per hour (CFH). If you’re welding in a windy or drafty area, you may need to increase the flow slightly.
Listen to the sound of the gas—if it’s a gentle whoosh, you’re likely in the right range. Does the weld area look clean without discoloration? That’s your gas flow working correctly. Have you tried adjusting the flow while watching the weld quality improve?
Assembling The Tig Torch
Assembling the TIG torch is a crucial part of setting up your welder. This process ensures the torch works correctly and safely. Each component must fit well to provide steady welding performance. Take your time with assembly to avoid issues later.
Installing The Electrode
Start by selecting the right tungsten electrode for your project. The electrode must be clean and sharp for best results. Insert it into the torch’s collet carefully. Push it in until about 1/8 inch sticks out. Tighten the collet body to hold the electrode firmly. Avoid overtightening to prevent damage.
Attaching The Collet And Nozzle
Place the collet over the electrode inside the torch head. The collet holds the electrode in place during welding. Screw the collet body onto the torch. Next, attach the ceramic nozzle over the collet body. The nozzle directs the shielding gas to the weld area. Tighten the nozzle by hand to secure it. Check all parts fit snugly without gaps.
Credit: blog.weldsupportparts.com
Performing A Test Weld
Performing a test weld is a vital part of setting up your TIG welder. It helps you confirm that the machine works correctly and the settings match your project needs. Testing also prevents wasted materials and ensures safety during the actual welding process.
Start by preparing a scrap piece of metal similar to your work material. Run a short weld bead on this scrap to observe the weld’s quality and behavior. This trial gives clear feedback on how the welder performs and what adjustments might be necessary.
Checking The Weld Bead
Look closely at the weld bead on the test piece. It should be smooth and shiny without cracks or holes. A good bead has a consistent width and height along its length. Watch for signs of overheating like discoloration or burn marks. These can weaken the metal and affect the weld’s strength.
Make sure the weld penetrates well but does not burn through the base metal. Check for even fusion between the filler and the base metal. The bead should also stick firmly without gaps or undercut edges.
Adjusting Settings If Needed
Change the amperage if the weld is too weak or burns too much. Increase amperage for deeper penetration, decrease it for lighter welds. Adjust the torch angle or speed if the bead looks uneven or irregular. Faster travel speed creates thinner beads, slower speed creates thicker beads.
Check the gas flow rate if the weld appears contaminated or porous. Proper shielding gas prevents oxidation and defects. Make small changes and test again until the weld bead meets your expectations. This process ensures strong, clean welds on your project parts.
Common Troubleshooting Tips
Troubleshooting is key to smooth TIG welding. Small problems can stop your work fast. Knowing common issues helps fix them quickly. This saves time and improves weld quality. Below are common tips to solve usual TIG welder problems.
Dealing With Contaminated Welds
Contaminated welds weaken joints and cause defects. Dirt, oil, or rust on metal can spoil welds. Always clean the metal surface well before welding. Use a wire brush or grinder for best results.
Check the tungsten electrode for contamination too. Replace it if it has dirt or metal buildup. Use proper shielding gas to protect the weld area. Argon gas is common and keeps air away.
Keep hands and tools clean to avoid adding dirt. Avoid touching the tungsten tip with bare hands. Contaminants cause porosity and weak welds. Clean parts and tools regularly to maintain quality.
Fixing Inconsistent Arcs
An unstable arc can cause poor welds and spatter. Check the power settings on your TIG welder first. Set the amperage according to metal thickness. Too high or low amperage affects arc stability.
Inspect the tungsten electrode shape. A sharp, pointed tip offers a steady arc. Use the right tungsten size for the job. Also, check the torch angle; keep it steady while welding.
Ensure the gas flow rate is correct. Too much or too little gas can disturb the arc. Typical flow rate is 15-20 cubic feet per hour. Clean the gas nozzle regularly to prevent blockages.
Credit: www.weldingweb.com
Frequently Asked Questions
What Equipment Is Needed To Set Up A Tig Welder?
To set up a Tig welder, you need a Tig welding machine, tungsten electrodes, shielding gas (argon), a regulator, and proper safety gear like gloves and helmet.
How Do I Prepare The Tungsten Electrode For Tig Welding?
Sharpen the tungsten electrode to a fine point using a grinding wheel. This ensures stable arc and precise welds for better results.
What Gas Is Best For Tig Welding Setup?
Argon is the most common shielding gas for Tig welding. It protects the weld pool from contamination and ensures clean, strong welds.
How To Adjust Amperage Settings On A Tig Welder?
Set the amperage based on metal thickness. Thicker metals require higher amps; thinner metals need lower amps for a quality weld.
Conclusion
Setting up a TIG welder is easier than it seems. Follow each step carefully for safe, strong welds. Choose the right settings for your metal type. Keep your workspace clean and organized. Practice often to improve your technique and confidence.
Remember to wear proper safety gear every time. With patience, you will weld like a pro. Start your welding project with the right setup today.
About The Author

