
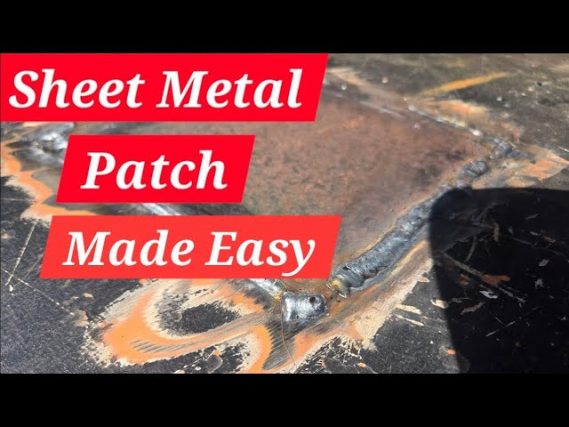
Welding thin metal can be tricky, but it doesn’t have to be frustrating. If you’ve ever struggled with burn-through or weak joints, you’re not alone.
The good news is, with the right technique and a few simple tips, you can master stick welding thin metal and create strong, clean welds every time. You’ll discover exactly how to control your heat, choose the right settings, and avoid common mistakes that ruin your work.
Ready to take your welding skills to the next level? Let’s dive in and make your thin metal projects look professional and last longer.
Choosing The Right Equipment
Choosing the right equipment is crucial for stick welding thin metal. The wrong setup can lead to burn-throughs or weak joints, which defeats the purpose of your work. Understanding each piece of equipment helps you get a clean, strong weld every time.
Selecting The Appropriate Welder
Not all welders handle thin metal equally. You need a welder with adjustable amperage so you can dial down the heat and avoid burning through the metal.
Stick welders that offer a low amp range, around 20-60 amps, work best for thin sheets. Have you checked if your welder can maintain a stable arc at low settings? If not, it might be time to upgrade or rent a machine designed for precision.
Picking Suitable Electrodes
The electrode you choose influences the quality and appearance of your weld. Thin metal requires a low amperage electrode to prevent excessive heat buildup.
Electrodes like E6010 or E6011 can be too aggressive. Instead, consider E6013 or E7014 rods, which provide smoother arcs and less spatter. You’ll notice a cleaner weld bead and less chance of melting through your workpiece.
Setting Up Proper Safety Gear
Thin metal can be tricky and sparks or hot slag can still fly unexpectedly. Protecting yourself is non-negotiable.
Always wear a welding helmet with the correct shade—usually shade 10 or 11 for stick welding thin metal. Don’t skip flame-resistant gloves and clothing that covers your skin completely.
Have you ever underestimated the heat from a small weld? Proper gear keeps you safe and confident, so you can focus on making precise, strong welds.

Credit: www.tiktok.com
Preparing Thin Metal For Welding
Preparing thin metal for welding is a crucial step that can make the difference between a strong bond and a weak, fragile weld. If the surface isn’t properly prepared, your welds may crack, burn through, or fail to hold. Taking time to clean, remove rust, and securely position your metal can save you hours of frustration and improve the quality of your work.
Cleaning And Degreasing The Surface
Start by removing any dirt, grease, or oil from the metal surface. These contaminants can cause poor weld penetration and create weak spots.
Use a clean cloth with a degreaser or acetone to wipe down the area thoroughly. Avoid touching the cleaned surface with your fingers afterward, as oils from your skin can contaminate it.
Removing Rust And Paint
Rust and paint act as barriers to the welding arc, preventing good fusion between metals. Use a wire brush, grinder, or sandpaper to strip these off until you see bare, shiny metal.
Be careful not to thin the metal too much while cleaning. Removing just enough to expose clean metal ensures a stronger weld without compromising the material’s thickness.
Clamping And Positioning Metal Pieces
Properly securing your metal pieces is essential to maintain alignment and prevent movement during welding. Use clamps or magnets designed for welding to hold parts firmly in place.
Think about the direction of your weld and how heat will affect the metal’s position. A steady setup reduces mistakes and keeps your welds consistent and clean.
Optimizing Welder Settings
Optimizing welder settings is crucial when stick welding thin metal. It can be the difference between a smooth weld and a warped mess. By fine-tuning your welder’s settings, you ensure that you maintain control, prevent burn-through, and achieve consistent results. Let’s explore the key adjustments that can help you master the art of welding thin metal.
Adjusting Current And Voltage
Finding the right balance of current and voltage is key. Lower current settings are essential for thin metals to prevent excessive heat, which can cause burn-through. A good starting point is around 40 to 60 amps, but this can vary based on the specific metal thickness. Experiment by gradually adjusting the settings until you find the sweet spot.
Voltage adjustments are equally important. Ensure your voltage is set to maintain a stable arc. A too-high voltage can lead to spatter, while too low can cause the arc to extinguish frequently. Aim for a smooth, consistent arc to achieve a clean weld.
Controlling Heat Input
Heat input must be carefully controlled to avoid distorting the metal. Use short welding bursts, often referred to as “stitch welding,” to allow the metal to cool between passes. This technique helps manage heat buildup and prevents warping.
Consider using a smaller diameter electrode for thin metals, as it requires less heat to melt. This helps in controlling the overall heat input effectively. Remember, patience and precision are your best tools when managing heat.
Setting Welding Speed
Welding speed plays a crucial role in the quality of your weld. Moving too fast can lead to weak, inconsistent welds, while going too slow might cause overheating and burn-through. Aim for a steady, moderate pace that allows you to maintain control over the arc.
As you gain experience, you’ll develop a feel for the right speed. It’s a skill honed over time, much like riding a bike. Consider practicing on scrap pieces to refine your technique before tackling a project.
Are you ready to dive into the world of thin metal welding with confidence? With the right settings, you can transform your projects from ordinary to extraordinary. What’s your next welding challenge?

Credit: www.facebook.com
Techniques For Stick Welding Thin Metal
Stick welding thin metal needs careful control and specific methods. Thin metal can burn through easily. Using the right techniques helps keep the metal strong and neat. Small adjustments in welding style make a big difference in results.
Using Shorter Welds And Tack Welds
Shorter welds reduce heat build-up on thin metal. This limits warping and burning through. Tack welds hold pieces in place without adding too much heat. They allow for adjustments before finishing the full weld. Tack welds also help control the metal’s shape during welding.
Maintaining Proper Electrode Angle
Keep the electrode at about a 15 to 20-degree angle. This helps direct heat away from the thin metal. It also improves control over the weld pool. A steady angle prevents uneven melting and reduces spatter. Hold the electrode close for a precise, clean weld.
Employing Stringer Beads
Use stringer beads instead of weaving motions. Stringer beads are straight, narrow welds. They apply less heat to the metal surface. This decreases the chance of burn-through and warping. Moving the electrode steadily forward creates a strong, smooth weld.
Avoiding Common Issues
Welding thin metal with a stick welder can be tricky. You might face issues like burn-through, distortion, or excess spatter that ruin your work. Knowing how to avoid these common problems will save you time and frustration, making your welds cleaner and stronger.
Preventing Burn-through
Burn-through happens when the heat melts right through the thin metal. To avoid this, use a lower amperage setting on your welder. It’s tempting to crank up the power, but that often causes more harm than good.
Try using a welding rod designed for thin metals, such as a 6013 or 7014. These rods create a softer arc and reduce the risk of punching holes.
Also, keep your welding speed steady and move quickly enough to avoid lingering heat in one spot. Have you noticed how slowing down too much can make the metal bubble? That’s your cue to pick up the pace.
Reducing Distortion
Thin metal warps easily from heat. To keep your piece flat, weld in short bursts instead of long continuous beads. This lets the metal cool between passes and reduces stress.
Clamping the metal firmly before welding helps too. It holds everything in place and counters the pull from the heat. If you don’t have clamps, try tack welding small spots first to secure the metal.
Balance the heat by welding on opposite sides of the piece alternately. This technique distributes the heat evenly. Have you tried flipping your work or switching sides mid-weld to keep distortion down?
Managing Spatter And Slag
Spatter and slag are annoying but manageable. Use the right electrode angle—about 75 to 80 degrees—and keep a steady hand. This controls the arc and reduces splatter.
After welding, clean the slag off promptly with a chipping hammer and wire brush. Leaving slag on the weld weakens it and makes your work look sloppy.
Sometimes adjusting your travel speed helps too. Moving too slowly causes more slag buildup, while moving too fast can create gaps. Finding the right speed is key to neat welds.
Post-weld Treatment
Post-weld treatment is vital for strong and lasting welds on thin metal. It helps protect the weld and improves its appearance. Proper care after welding prevents rust and cracks. This section covers key steps for treating your welds.
Cleaning Welds
Cleaning removes slag, dirt, and oxidation from welds. Use a wire brush or grinder for thin metal. Avoid harsh tools that can damage the metal. Clean welds allow better inspection and coating. Make sure the surface is smooth and free of debris.
Inspecting Joints For Defects
Check welds for cracks, holes, or weak spots. Look closely at the edges and inside the weld bead. Small defects can lead to failure later. Use good lighting and a magnifier if needed. Fix problems by grinding out flaws and rewelding if necessary.
Applying Protective Coatings
Protective coatings prevent rust and corrosion on thin metal welds. Apply paint, primer, or anti-rust spray after cleaning and inspection. Choose coatings suitable for the metal type and environment. Ensure full coverage, especially on edges and corners. Allow coating to dry completely for best results.
Advanced Tips For Consistent Results
Achieving consistent results in stick welding thin metal requires more than basic skills. Advanced tips help improve precision and avoid common issues. These techniques focus on practice, adapting to metal types, and proper equipment care. Each factor plays a key role in producing strong, clean welds every time.
Practicing On Scrap Metal
Practice builds confidence and control. Use scrap metal pieces to test your settings and technique. This allows you to adjust your speed and angle without risking valuable materials. Experiment with different rods and currents. Notice how the weld bead forms. Practice helps develop a steady hand and better timing for thin metal welding.
Adjusting Technique For Different Metals
Different metals require unique welding approaches. Steel, stainless steel, and aluminum each behave differently under heat. Adjust your amperage to prevent burn-through. Change your electrode angle slightly to suit the metal’s thickness. Pay attention to the metal’s heat conductivity. This adjustment reduces warping and weak spots in the weld.
Keeping Equipment Maintained
Well-maintained equipment ensures stable performance. Clean your electrode holder regularly to avoid poor contact. Check cables for damage or wear. Replace worn electrodes to keep weld quality high. Keep your welding machine calibrated. Proper maintenance prevents inconsistent arcs and weak welds on thin metals.

Credit: www.youtube.com
Frequently Asked Questions
What Is Stick Welding For Thin Metal?
Stick welding for thin metal uses a low-amperage setting and thin electrodes. It requires careful control to avoid burn-through and warping.
How To Prevent Burn-through When Welding Thin Metal?
Use a lower amperage, quick weld passes, and thin electrodes. Also, keep the electrode angle shallow and avoid lingering in one spot.
Which Electrodes Work Best For Thin Metal Stick Welding?
Choose 6013 or 7014 electrodes. They provide smooth arcs and better control, ideal for welding thin metals without excess heat.
How To Control Heat When Stick Welding Thin Metal?
Use short weld beads and pause between passes. This reduces heat buildup and prevents metal distortion or holes.
Conclusion
Sticking weld thin metal takes patience and care. Use the right settings on your welder. Keep your metal clean and dry before welding. Small, quick welds work better than long ones. Watch the heat to avoid bending or burning metal.
Practice on scrap pieces to improve your skill. This way, you get strong, clean welds every time. Welding thin metal can be simple with these tips. Try them out and see your work improve.
About The Author

