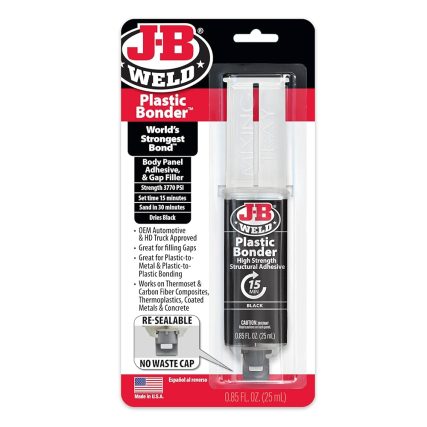
If you’ve ever faced a tough plastic repair, you know how frustrating it can be to find the right solution. That’s where J-B Weld Plastic Bonder comes in—a powerful adhesive designed to make your plastic fixes strong and lasting.
But how do you use it correctly to get the best results? In this guide, you’ll discover simple, step-by-step tips that anyone can follow. By the end, you’ll feel confident tackling your plastic repairs like a pro. Keep reading to unlock the secrets of using J-B Weld Plastic Bonder effectively and save time, money, and stress on your next project.
Choosing The Right J-b Weld Plastic Bonder
Choosing the right J-B Weld Plastic Bonder is important for a strong, lasting repair. Different types suit different tasks and materials. Knowing the options helps pick the best product for your project.
Types Of Plastic Bonder
J-B Weld offers several plastic bonder types. Each has unique features and uses:
- Plastic Bonder Original:A two-part epoxy for tough plastic repairs.
- Plastic Bonder Clear:A clear version for invisible fixes.
- Plastic Bonder Gel:Thicker and ideal for vertical surfaces.
- Plastic Bonder Quick-Set:Sets faster for quick repairs.
Choose based on the surface and repair type. Consider drying time and appearance.
Compatibility With Materials
J-B Weld Plastic Bonder works on many plastics, but not all. It bonds well with:
- ABS
- PVC
- Fiberglass
- Polycarbonate
- Polypropylene (with surface prep)
Check product labels for specific compatibility. Some plastics need roughening or cleaning before bonding. Proper surface prep ensures a stronger hold.
Credit: www.youtube.com
Preparing The Surface
Preparing the surface is a crucial step before applying J-B Weld Plastic Bonder. A clean and rough surface helps the adhesive stick better. This improves the bond strength and durability of your repair. Spend time on this stage for the best results.
Cleaning Techniques
Remove all dirt, grease, and oil from the surface. Use a cloth with rubbing alcohol or acetone to wipe the area. Avoid water or soap, as they can leave residue. Let the surface dry completely before moving on.
- Use a clean cloth or paper towel
- Apply rubbing alcohol or acetone
- Wipe the surface thoroughly
- Allow the surface to dry fully
Surface Roughening
Create a rough texture to improve adhesion. Lightly sand the surface with fine-grit sandpaper. Focus on the repair area and edges. Sanding helps the Plastic Bonder grip the surface firmly. Clean off any dust after sanding.
- Use 120 to 220 grit sandpaper
- Sand in circular motions
- Focus on the bonding area
- Remove dust with a dry cloth
Mixing The Components
Mixing the components of J-B Weld Plastic Bonder correctly is key for a strong bond. The two parts must combine evenly to activate the adhesive properties. Careful mixing ensures the epoxy hardens properly and sticks well to plastic surfaces.
Correct Ratios
The two parts of J-B Weld Plastic Bonder are the resin and the hardener. Use equal amounts of each part for the best results. Avoid guessing the amount; use a small measuring tool or a flat surface to portion the components.
- Take equal-sized blobs of resin and hardener.
- Match the amounts by volume, not weight.
- Do not mix more than you need.
Ensuring Consistency
Mix the resin and hardener thoroughly to achieve a smooth paste. Use a clean stick or spatula to stir both parts together.
- Mix for at least 30 seconds.
- Scrape the sides and bottom of the mixing surface.
- The mixture should look uniform without streaks.
- Stop mixing once the color and texture become even.
Proper mixing prevents soft spots and weak bonds. Work quickly, as the mixture starts to harden after a few minutes.
Application Techniques
Applying J-B Weld Plastic Bonder correctly ensures a strong and lasting bond. Proper techniques help the adhesive spread well and stick firmly. It also prevents mess and waste during the process.
Using Applicators
Use the applicator included with the J-B Weld Plastic Bonder kit. It usually has a small spatula or a brush tip. These tools help control the amount of adhesive you apply. Avoid using your fingers to keep the bond clean. Dip the applicator gently into the adhesive and pick up a small amount. This prevents applying too much, which can cause weak spots.
Spreading Evenly
Spread the adhesive thin and even across the surface. Use smooth strokes with the applicator to cover the area. Avoid thick blobs, as they take longer to dry and may peel off. Cover the edges and corners well for full adhesion. After spreading, press the parts together firmly. Hold them in place until the bond starts to set. This ensures the best connection and durability.
Curing Process
The curing process is a crucial step when using J-B Weld Plastic Bonder. It determines how strong and durable the bond will be. Paying close attention to temperature and time can make a big difference in your repair’s success.
Optimal Temperature
J-B Weld Plastic Bonder cures best at room temperature, around 70°F (21°C). If the temperature is too low, the curing slows down significantly, which means you’ll wait longer for the bond to set. On the other hand, temperatures above 80°F (27°C) speed up the reaction, but too much heat can cause the adhesive to cure unevenly or become brittle.
If you’re working in a cold garage or outdoors during winter, try warming the parts slightly before applying the bond. A hairdryer or a warm towel can help bring the surface temperature closer to the ideal range. Have you noticed your repairs failing faster in colder conditions? Adjusting the temperature might be the key.
Time Requirements
After mixing and applying the Plastic Bonder, you’ll need to let it cure without disturbing the joint. Initial set time is about 15 minutes, during which the bond will hold but isn’t fully cured yet. You should avoid putting any stress on the repair during this period.
For a full cure, expect to wait at least 1 hour at optimal temperature. This allows the adhesive to reach maximum strength and durability. If you need to handle or paint the part, waiting 4 to 6 hours ensures the bond is completely hardened.
Have you ever been tempted to rush a repair? Skipping the full cure time can cause cracks or weak spots. It’s better to plan your project timeline around these requirements to avoid frustration later.

Credit: www.amazon.com
Testing The Repair
After applying J-B Weld Plastic Bonder, testing the repair is crucial to ensure it holds strong and lasts. This step helps you confirm the bond’s durability before putting the item back into regular use. Without testing, you might risk the repair failing at the worst moment.
Checking Bond Strength
Start by gently pressing or flexing the repaired area. You want to feel if the bond resists your pressure without cracking or separating.
Try to avoid sudden or extreme force initially; small, controlled pressure gives you a better sense of the bond’s condition. If the repair holds firm, it’s a good sign the bond is strong.
Consider testing in different directions—twisting, pulling, or bending slightly. This approach reveals weaknesses you might miss by only pressing in one way.
Addressing Weak Spots
If you notice any cracking, peeling, or soft spots, those are weak points that need attention. Don’t ignore them, as they can lead to full failure later on.
Apply a little more Plastic Bonder to these spots and let it cure fully. Sometimes, layering the product strengthens the bond significantly.
After reapplying, test the repair again with the same gentle pressure. Repeat this process until the bond feels solid and secure.
Tips For Long-lasting Repairs
To make your repairs with J-B Weld Plastic Bonder last, you need to think beyond just applying the product. The way you prepare, apply, and care for the bond plays a huge role in its durability. Small adjustments in your technique can prevent common issues like cracking or peeling over time.
Avoiding Stress Points
Stress points are areas where the bond faces the most pressure or movement. These spots often lead to cracks or breaks if not handled correctly.
Try to position the parts so the bond line isn’t under constant bending or twisting. If your repair involves a joint, support it with clamps or additional reinforcements while the bond cures. This little extra care spreads out the stress and keeps the bond strong.
I once repaired a cracked plastic toolbox handle using J-B Weld. By reinforcing the handle with a small metal strip beneath the bond, I stopped it from snapping again, even after heavy use. What areas in your project might need extra support to avoid stress?
Maintaining Bond Integrity
Keeping the bond intact means protecting it from elements that can weaken it over time.
- Keep the bonded area clean and dry. Dirt and moisture reduce adhesion strength.
- Avoid exposing the repaired part to harsh chemicals or extreme temperatures right after curing.
- Consider applying a protective coating or paint once the bond fully cures to shield it from UV damage and wear.
Think about how the repaired item will be used daily. Will it face water, heat, or friction? Taking these factors into account helps you decide how to protect your repair better.
Safety Precautions
Using J-B Weld Plastic Bonder can be straightforward, but safety should always come first. Ignoring basic precautions can lead to skin irritation or inhaling harmful fumes. Let’s look at key safety steps that protect you while you work.
Protective Gear
Always wear gloves to keep the adhesive off your skin. The chemicals can cause irritation or allergic reactions even after brief contact. I once skipped gloves and ended up with a rash that lasted days—don’t make the same mistake.
Eye protection is a must. Safety goggles shield your eyes from accidental splashes, which can be painful and dangerous. A simple pair of goggles is inexpensive but can prevent a serious injury.
Consider wearing long sleeves or a protective apron. This limits the chance of the adhesive touching your clothes or skin. Small splatters can be tough to remove and cause discomfort.
Ventilation Needs
J-B Weld Plastic Bonder releases fumes that can irritate your respiratory system. Always work in a well-ventilated area to keep fresh air flowing around you. Opening windows or using a fan helps reduce the buildup of fumes.
Have you ever felt lightheaded or dizzy while working with adhesives? That’s a sign you need better airflow. If you can’t work outside, try a respirator mask designed to filter chemical fumes for added protection.
Pay attention to the smell. If it becomes strong or overwhelming, stop and increase ventilation immediately. Your health is more important than rushing to finish a project.

Credit: www.jbweld.com
Frequently Asked Questions
What Surfaces Work Best With J-b Weld Plastic Bonder?
J-B Weld Plastic Bonder works best on plastics, fiberglass, and metals. It bonds well to PVC, ABS, and more. Ensure surfaces are clean and dry for optimal adhesion. This makes it versatile for various repair tasks.
How Long Does J-b Weld Plastic Bonder Take To Cure?
The initial cure time is about 15 minutes. Full cure occurs within 1 hour for most repairs. Cure time may vary with temperature and humidity. Avoid stress on the bond until fully cured.
Can J-b Weld Plastic Bonder Be Painted Or Sanded?
Yes, once fully cured, it can be sanded and painted. This allows seamless repair blending with original surfaces. Wait at least 1 hour before sanding or painting for best results.
Is J-b Weld Plastic Bonder Waterproof After Curing?
Yes, it creates a strong, waterproof bond. It resists water, oils, and most chemicals. This makes it ideal for automotive and household plastic repairs exposed to moisture.
Conclusion
J-B Weld Plastic Bonder works well for many plastic repairs. It bonds quickly and holds strong. Clean the surfaces before you apply the glue. Press the parts together firmly for best results. Let it dry fully to ensure a solid fix.
This adhesive helps fix broken items fast and easy. Keep these steps in mind for your next repair. Simple and effective—J-B Weld Plastic Bonder gets the job done.
