Are you ready to take your welding skills to the next level? Learning how to use a TIG welder can open up new possibilities for creating strong, precise, and clean welds.
Whether you’re a beginner or looking to improve, this guide will walk you through the essential steps and tips to master TIG welding quickly and safely. By the end, you’ll feel confident handling your welder and producing professional-quality results. Keep reading to unlock the full potential of your TIG welder and transform your projects!

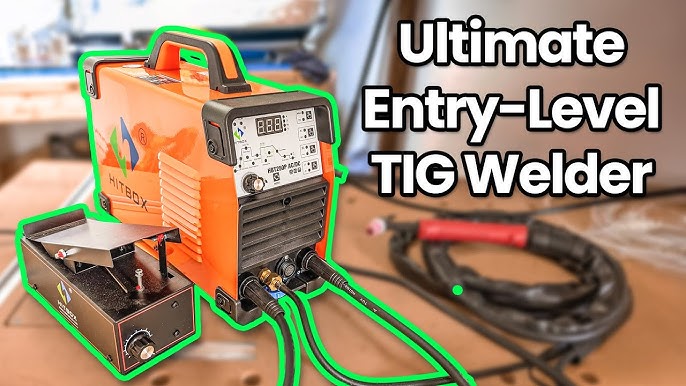
Credit: www.sytechprecision.com
Essential Equipment
Using a TIG welder requires specific tools and safety gear. The right equipment ensures smooth welding and protects you from hazards. This section covers the essential gear needed before starting any TIG welding project.
Tig Welder Components
A TIG welder has several key parts that work together. Understanding these helps in setting up and using the machine properly.
- Power Supply:Provides the electric current for welding.
- Torch:Holds the tungsten electrode and directs the arc.
- Tungsten Electrode:Creates the arc needed to melt metal.
- Filler Rod:Adds material to the weld joint when needed.
- Gas Supply:Usually argon, protects the weld from contamination.
- Foot Pedal or Hand Control:Adjusts the current during welding.
Protective Gear And Safety
Safety is crucial in TIG welding to avoid injuries. Proper gear protects your body from sparks, heat, and UV light.
- Welding Helmet:Shields your eyes and face from bright light and sparks.
- Gloves:Heat-resistant gloves protect your hands from burns.
- Protective Clothing:Long sleeves, flame-resistant jackets, and pants reduce skin exposure.
- Respirator Mask:Filters harmful fumes and dust during welding.
- Safety Glasses:Worn under the helmet for extra eye protection.
- Proper Footwear:Closed-toe, leather boots protect your feet.

Credit: yeswelder.com
Preparing The Workspace
Preparing the workspace is crucial before using a TIG welder. A clean, organized area improves safety and weld quality. Proper setup helps avoid accidents and ensures smooth work flow.
Setting Up The Welding Area
Choose a well-ventilated space free from flammable materials. Clear the workbench and floor of clutter. Use a welding curtain or screen to protect others nearby. Ensure the welding machine is close to a power source.
Arrange tools within easy reach. Keep a fire extinguisher nearby for emergencies. Use a sturdy, flat surface to place the metal pieces. Good lighting helps see the weld clearly.
Material Preparation
Clean the metal pieces by removing rust, oil, and paint. Use a wire brush or grinder for this task. Make sure edges to be welded are smooth and fit well together. Proper cleaning prevents contamination in the weld pool.
Check the thickness of the material. Select the right filler rod based on the metal type. Secure the metal firmly to avoid movement during welding. Preparation ensures strong, clean welds.
Choosing The Right Electrode
Choosing the right electrode is crucial for a successful TIG welding project. The electrode affects the weld quality, strength, and appearance. Picking the wrong type can lead to weak joints or excessive spatter, which nobody wants.
Types Of Electrodes
TIG welding primarily uses tungsten electrodes, but there are different types based on the alloy composition:
- Pure Tungsten (Green Tip):Best for welding aluminum and magnesium with AC current. It offers excellent arc stability but wears out quickly.
- Thoriated Tungsten (Red Tip):Commonly used for DC welding on steel and stainless steel. It has good electron emission but is mildly radioactive, so handle with care.
- Lanthanated Tungsten (Blue or Gold Tip):Versatile and works well with both AC and DC currents. It lasts longer and provides stable arcs.
- Ceriated Tungsten (Orange Tip):Ideal for low amperage DC welding. It offers easy arc starting and consistent performance.
Understanding these types helps you match the electrode to your welding material and power source, improving your weld’s efficiency.
Electrode Selection Tips
Start by identifying the metal you want to weld and its thickness. Thicker metals usually need larger diameter electrodes to handle higher currents.
If you’re welding aluminum, a pure tungsten electrode with AC current generally works best. For steel and stainless steel, lanthanated or thoriated electrodes with DC current provide strong, clean welds.
Remember, electrode angle and cleanliness also impact weld quality. Keep the electrode sharp for precise arcs and avoid contamination by not touching the weld pool with the electrode.
Have you ever struggled with welds that crack or lack fusion? Trying a different electrode type or size might solve that issue quickly.
Adjusting Welder Settings
Adjusting your tig welder settings correctly is key to getting clean, strong welds. Each project may require different tweaks to your machine. Understanding how to set your current, voltage, and gas flow rate can make a noticeable difference in your welding results.
Current And Voltage
Current controls the heat generated during welding. Too high, and you risk burning through the metal; too low, and your weld won’t penetrate properly. Start by matching the current to the thickness of your metal—thicker metals need higher amps.
Voltage affects the arc stability and bead shape. Higher voltage gives a wider arc and smoother bead, while lower voltage produces a narrower, deeper weld. Adjust voltage in small increments while watching the arc to find the sweet spot.
Have you ever noticed a weld bead that’s either too flat or too convex? This usually points to voltage settings that are off balance. Experiment with slight voltage changes and watch your bead transform.
Gas Flow Rate
The gas shields your weld from contamination. Setting the flow rate too low allows air in, causing porosity and weak welds. Too high, and you risk turbulence, which also drags air into the weld zone.
Typical flow rates range between 15 to 20 cubic feet per hour (CFH), but this varies by nozzle size and welding conditions. A good practice is to start at 15 CFH and adjust based on weld appearance and sound.
When welding outdoors or in windy areas, consider increasing your gas flow slightly to maintain protection. Have you checked your gas flow recently? Even small leaks or blockages can change your flow rate without you noticing.
Mastering Welding Techniques
Mastering welding techniques with a TIG welder requires focus and control. This skill improves the quality of your welds and ensures safety. Practice builds confidence and precision. The key lies in handling the arc and steady hand movements. These fundamentals create strong, clean welds every time.
Starting And Stopping The Arc
Start by holding the torch close to the workpiece without touching it. Press the foot pedal slowly to ignite the arc. A smooth start prevents damage to the metal. Keep the arc length short for better control.
To stop, release the foot pedal gradually. Avoid sudden stops to prevent crater cracks. Move the torch away slowly after the arc stops. This technique protects the weld bead and the base metal.
Maintaining A Steady Hand
Keep your wrist and arm steady during welding. Rest your elbow or arm on a stable surface for support. Small hand movements lead to uneven welds. Use both hands if needed to guide the torch smoothly.
Maintain a consistent speed and angle. This helps the filler rod melt evenly into the joint. Watch the weld pool closely to adjust your movements. A steady hand creates clean, uniform weld beads every time.
Common Mistakes To Avoid
Using a TIG welder effectively requires more than just setting up your equipment. Many welders, especially beginners, stumble on common mistakes that can affect the quality and durability of their welds. Understanding these pitfalls helps you avoid frustration and improve your skills faster.
Overheating Issues
Overheating is a frequent problem that can damage both your workpiece and your equipment. If the metal gets too hot, it can warp or weaken, ruining your project.
Watch the heat input carefully. You don’t want to hold the torch in one spot for too long. Moving steadily and adjusting your amperage to suit the metal thickness can prevent excessive heat buildup.
Have you noticed discoloration or burn marks on your welds? These are signs you’re applying too much heat. Try lowering the current and increasing your travel speed to keep the metal cool and strong.
Poor Penetration
Poor penetration is when the weld doesn’t fuse properly with the base metal, leading to weak joints. It often happens if the amperage is too low or the torch angle is incorrect.
Keep the torch at about a 15-degree angle from vertical and ensure your amperage matches the thickness of the metal. If your weld beads look shallow or easily chip away, it’s time to adjust these settings.
Think about your last project where the weld didn’t hold up. Could it have been poor penetration? Small tweaks in technique often make a big difference here.
Troubleshooting Tips
Troubleshooting TIG welding issues helps keep your work strong and clean. Recognizing common problems early saves time and materials. Understanding defects guides you to the right solutions fast. Below are key tips to identify and fix welding defects effectively.
Identifying Weld Defects
Weld defects can weaken your joint and cause failure. Watch for these signs:
- Cracks:Thin lines that can run along or across the weld.
- Porosity:Small holes or bubbles in the weld metal.
- Lack of Fusion:Areas where the weld metal did not properly bond.
- Undercut:Grooves at the weld toe, weakening the joint.
- Spatter:Small metal droplets outside the weld area.
- Distortion:Warping of the metal due to heat.
Check the weld bead shape and surface for smoothness. Use a magnifying glass for detailed inspection. These simple steps catch defects early.
Quick Fixes
Fixing welding problems often involves adjusting settings and technique. Try these quick fixes:
- Adjust Current:Lower current to reduce burn-through or raise it to improve fusion.
- Check Gas Flow:Ensure proper shielding gas flow to prevent porosity.
- Clean Metal:Remove rust, oil, or paint for better weld quality.
- Use Correct Tungsten Size:Match tungsten size to material thickness for stable arc.
- Modify Travel Speed:Slow down to fill gaps, speed up to avoid overheating.
- Position Electrode Properly:Maintain angle and distance for consistent arc.
Regular maintenance of your TIG welder also prevents many issues. Clean torch parts and check cables often.
Advanced Techniques
Advanced TIG welding techniques help you create stronger and cleaner welds. These skills allow you to work on various projects with precision. Understanding how to handle different metals and use filler rods expands your welding capabilities.
Welding Different Metals
TIG welding works well on many metals like steel, aluminum, and stainless steel. Each metal needs a specific approach for the best results.
- Clean the metal surface to remove dirt and rust.
- Adjust the welding machine settings for the metal type.
- Use the right gas, usually argon, for shielding.
- Control heat input to avoid warping or burning.
Aluminum requires faster welding and AC current for a stable arc. Stainless steel needs lower heat to keep its strength and shine. Practicing with each metal helps you learn the best technique.
Using Filler Rods
Filler rods add extra material to the weld joint. They help fill gaps and strengthen the weld.
- Choose the filler rod that matches the base metal.
- Hold the rod at a 15 to 20-degree angle from the torch.
- Feed the rod slowly into the weld pool, not the arc.
- Keep the weld pool steady and avoid overheating.
Using filler rods requires good hand-eye coordination. This skill improves with practice and patience.
Maintenance And Care
Maintenance and care keep a TIG welder working safely and well. Regular upkeep avoids problems and extends the machine’s life. Clean parts and check the equipment often. This helps maintain good welding quality and prevents costly repairs.
Cleaning The Torch
Clean the torch after every use. Remove dirt and metal dust from the nozzle and tip. Use a soft brush or cloth for cleaning. Check the ceramic cup for cracks or damage. Replace worn parts to keep the torch working properly. Proper cleaning prevents blockages and improves gas flow.
Regular Equipment Checks
Inspect cables and hoses for cracks or wear. Look for loose connections and tighten them. Check the gas flow and pressure regularly. Test the foot pedal and control switches for smooth function. Replace any damaged or worn parts immediately. Routine checks ensure safety and better welding results.

Credit: weldmongerstore.com
Frequently Asked Questions
What Safety Gear Is Essential For Tig Welding?
Always wear a welding helmet with proper shade, flame-resistant gloves, and long sleeves. Use safety glasses and ensure good ventilation to protect against fumes and sparks.
How Do You Prepare Metal For Tig Welding?
Clean the metal surface thoroughly by removing rust, paint, and oil. Use a wire brush or grinder for best results to ensure a strong weld.
What Type Of Tungsten Electrode Is Best For Tig Welding?
Use 2% thoriated or 2% lanthanated tungsten electrodes for most TIG welding tasks. They provide stable arc and longer life for precise welding.
How To Control Heat During Tig Welding?
Adjust the amperage according to metal thickness. Use a foot pedal or hand control to modulate heat for better weld quality and avoid warping.
Conclusion
Using a TIG welder takes practice and patience. Start with simple projects to build your skills. Always follow safety rules to protect yourself. Adjust settings based on the metal type and thickness. Keep your workspace clean and organized. Over time, your welds will become stronger and neater.
Remember, steady hands and focus make a big difference. Enjoy the process and learn from each weld. TIG welding can open new opportunities for your projects. Keep practicing to improve and gain confidence.
