
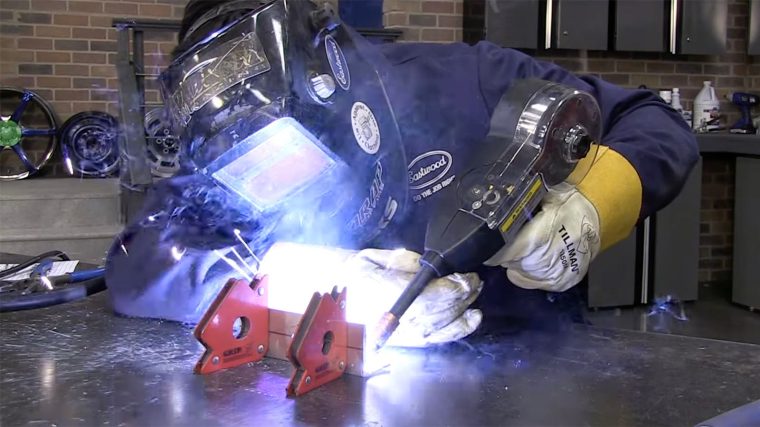
Welding aluminum with TIG can seem tricky at first, but once you learn the right steps, it becomes much easier. If you want strong, clean welds that last, mastering this skill is essential.
In this guide, you’ll discover simple tips and techniques that will help you weld aluminum like a pro. Whether you’re new to welding or looking to improve, this article will give you clear, practical advice you can use right away.
Keep reading to unlock the secrets of perfect aluminum TIG welds.

Credit: www.youtube.com
Choosing The Right Equipment
Choosing the right equipment is the foundation of successful aluminum TIG welding. The right tools not only make your work easier but also improve the quality of your welds. Understanding what gear fits your skill level and project needs will save you time and frustration.
Tig Welder Selection
Pick a TIG welder with AC/DC capability because aluminum requires AC for clean welding. Look for models with adjustable frequency control to manage the arc’s focus and heat input. A welder with a high duty cycle lets you work longer without overheating, which is crucial for bigger projects.
Consider your power supply too—220V machines provide more power but need proper outlets. If you’re just starting, a machine with simple controls will help you learn faster. Have you checked if your workshop can support the welder’s power requirements before buying?
Essential Safety Gear
Aluminum welding generates bright arcs and intense heat, so never skip safety gear. Use a welding helmet with a proper shade rating to protect your eyes from ultraviolet and infrared light. Flame-resistant gloves and a long-sleeve jacket shield your skin from sparks and heat.
Don’t forget about ventilation—aluminum welding fumes can be harmful. A respirator or good airflow can protect your lungs. Safety gear is not just a rule, it’s your best tool for staying safe and focused.
Aluminum-specific Tools
Aluminum behaves differently than steel, so choose tools made for it. Use a dedicated aluminum TIG torch with a water-cooled system if you plan on welding thick pieces. A high-quality tungsten electrode, like a zirconiated or ceriated type, helps maintain a stable arc.
You’ll also need a stainless steel or nylon brush to clean the aluminum surface before welding. Dirty surfaces cause weak welds, so keep your tools clean and ready. Have you noticed how much cleaner your aluminum welds look after thorough prep?
Credit: www.weldingweb.com
Preparing The Aluminum Surface
Preparing the aluminum surface is a crucial step that sets the foundation for a strong TIG weld. Skipping or rushing through this process can lead to weak welds and unwanted contamination. Paying close attention to the surface condition improves the weld quality and reduces the chance of defects.
Cleaning And Degreasing
Start by removing all dirt, grease, and oils from the aluminum. Use a clean cloth soaked in acetone or a dedicated aluminum cleaner. This ensures no contaminants interfere with the weld pool.
Never underestimate the power of a spotless surface. Even tiny amounts of grease can cause porosity or weak bonds. Ask yourself: Is your aluminum really clean enough to weld?
Removing Oxide Layer
Aluminum forms a thin oxide layer almost instantly when exposed to air. This layer melts at a much higher temperature than aluminum, which can disrupt the weld. Use a stainless steel wire brush specifically for aluminum or a chemical etching solution to remove this oxide.
I once ignored this step and ended up with a weld full of cracks and holes. The extra effort to remove oxide pays off every time by creating a smooth, clean surface ready for welding.
Proper Clamping Techniques
Holding the aluminum securely is key to preventing movement and warping during welding. Use clamps that distribute pressure evenly without damaging the metal. Position your clamps so they don’t interfere with the welding torch or filler rod.
Think about how small vibrations or shifts might ruin your weld bead. Solid clamping keeps everything steady, letting you focus on your technique rather than fixing mistakes later.
Selecting Filler Material
Selecting the right filler material is crucial when welding aluminum with TIG. The filler rod you choose affects the strength, appearance, and corrosion resistance of your weld. Paying attention to compatibility and size can save you from costly mistakes and weak joints.
Matching Filler Rods
The filler rod must closely match the type of aluminum alloy you are welding. Using a different alloy can cause cracks or poor weld quality. For example, 4045 and 5356 rods are popular choices, but 4045 is better for corrosion resistance while 5356 offers more strength.
Ask yourself: Is the filler rod chemically compatible with your base metal? Checking this before welding helps avoid problems later.
Filler Rod Diameter
The diameter of the filler rod impacts your control during welding. Smaller rods, like 1/16 inch, work well for thin sheets and delicate work. Larger rods, such as 3/32 inch, suit thicker materials and faster welds.
Choose a rod size that matches your project thickness to maintain steady heat and avoid burn-through. Have you noticed how using the wrong rod size can make your welds uneven or weak?
Storage Of Filler Materials
Proper storage keeps your filler rods clean and dry, which is essential for good welds. Aluminum filler rods absorb moisture that causes porosity in the weld. Keep them sealed in airtight containers or plastic bags with desiccant packs.
Don’t overlook storage—dirty or damp rods can ruin even the best welding technique. How often do you check your filler rods before starting a job?
Setting Up The Tig Welder
Setting up your TIG welder correctly is crucial for welding aluminum successfully. Getting the settings right helps you avoid common issues like poor weld quality or excessive contamination. Let’s break down the key adjustments you need to make before striking your first arc.
Adjusting Amperage
The amperage setting controls the heat output and directly affects your weld’s penetration and appearance. For aluminum, start with a lower amperage than you might use for steel since aluminum melts faster.
A good rule of thumb is about 1 amp for every 0.001 inch of thickness. So if you’re welding a 1/8 inch (0.125 inch) aluminum sheet, set your amperage around 125 amps. Adjust slightly based on how the weld puddle reacts—too hot and you’ll burn through, too cold and the weld won’t fuse properly.
Choosing The Right Tungsten Electrode
Your tungsten electrode choice can make or break your weld quality. For aluminum TIG welding, use a pure tungsten or a 2% lanthanated tungsten electrode. These provide a stable arc and resist contamination better than other types.
Sharpen your tungsten to a pointed tip for direct current (DC) or a balled tip for alternating current (AC), the mode used for aluminum. A well-prepared tungsten prevents arc wandering and keeps your weld clean.
Gas Flow Rate Settings
The shielding gas protects your weld from oxidation and contamination. Use 100% argon for aluminum welding as it provides excellent coverage and arc stability.
Set your gas flow rate between 15 and 20 cubic feet per hour (CFH). Too low a flow risks contamination, while too high can cause turbulence and suck in air. Watch your torch and adjust the flow if you see oxidation or if the weld puddle looks rough.
Mastering The Welding Technique
Welding aluminum with TIG requires skill and attention to detail. The technique affects the quality and strength of the weld. Small adjustments make a big difference in the final result.
Focus on torch angle, heat control, and managing the weld pool. These factors help create smooth, clean welds without defects. Practice these tips to improve your welding technique steadily.
Torch Angle And Position
Hold the torch at a 70 to 80-degree angle from the workpiece. This angle helps direct the heat evenly across the joint. Keep the torch steady to avoid uneven heating.
Position the torch so the flame points just ahead of the filler rod. This placement melts the base metal and filler smoothly together. Avoid pushing the torch too hard into the weld pool.
Controlling Heat Input
Aluminum needs careful heat control to prevent warping or burn-through. Use lower amperage for thin sheets and higher for thick pieces. Adjust heat based on the size and type of aluminum.
Move the torch steadily to avoid overheating any spot. Too much heat causes oxidation and weak welds. Let the metal cool slightly between passes if needed.
Managing The Weld Pool
The weld pool is the molten metal that forms during welding. Watch the pool size closely to keep it steady and manageable. A small, controlled pool leads to cleaner welds.
Use the filler rod to add metal smoothly into the pool. Feed the rod just ahead of the pool’s edge. This technique helps blend the filler and base metal well.
Credit: www.youtube.com
Troubleshooting Common Issues
Troubleshooting common issues while welding aluminum with TIG can save you time and material. Understanding what causes these problems will help you adjust your technique effectively. Let’s look at some frequent challenges and how you can handle them.
Porosity And Cracks
Porosity often appears as small holes or bubbles in your weld. It usually happens because of trapped gas, which can come from moisture or contaminants on the aluminum surface.
Make sure to clean your aluminum thoroughly before welding. Use a dedicated aluminum wire brush and wipe the surface with acetone to remove oils and dirt.
Cracks may develop if the weld cools too quickly or if your heat input is inconsistent. Try adjusting your travel speed or reducing the current slightly to avoid rapid cooling.
Inconsistent Weld Beads
If your weld beads look uneven or irregular, check your torch angle and travel speed first. Holding the torch too steep or moving too fast can cause inconsistent bead shape.
Maintaining a steady hand and a consistent pace is key. Use a push technique for better gas coverage and smoother beads on aluminum.
Also, verify your filler rod feed. Adding filler too fast or too slow can affect the bead’s appearance and strength.
Oxidation Problems
Aluminum forms a tough oxide layer that melts at a much higher temperature than the base metal. This oxide can cause poor weld penetration and weak joints.
Use AC current on your TIG welder to help break up the oxide layer during welding. The cleaning action of AC is essential for aluminum.
Don’t forget to clean the tungsten electrode regularly to maintain good arc stability. A contaminated tungsten can worsen oxidation issues.
Post-weld Treatment
Post-weld treatment is essential to ensure strong and clean aluminum TIG welds. It helps protect the weld and improves its appearance. Proper care after welding increases the lifespan of the joint and prevents future problems.
Cleaning Welded Surfaces
Remove all slag, dirt, and oxidation from the welded area. Use a stainless steel wire brush made for aluminum. Avoid using brushes that have been used on other metals to prevent contamination. Clean the surface with a suitable solvent to remove oils and grease. Dry the weld thoroughly before any further processing.
Inspecting Weld Quality
Check the weld for cracks, porosity, or undercuts. Look for uniform bead shape and consistent penetration. Use visual inspection first, then consider non-destructive testing if needed. Proper inspection helps catch defects early. It ensures the weld will hold under stress.
Correcting Defects
Small cracks or porosity can weaken the weld. Grind out defective areas carefully with a rotary tool. Re-weld the cleaned spots using the correct TIG settings. Avoid overheating to prevent distortion. Repeat inspection after repairs to confirm quality.
Advanced Techniques For Professionals
Advanced TIG welding techniques for aluminum require precise control and deep knowledge. Professionals refine their skills to handle challenging materials and designs. These techniques improve weld quality, strength, and appearance.
Understanding the nuances of aluminum’s properties is essential. Techniques vary depending on thickness, joint complexity, and project demands. Mastery involves practice, patience, and attention to detail.
Thin Aluminum Welding
Welding thin aluminum calls for low heat input. Use a smaller tungsten electrode to focus the arc. Keep the amperage low to avoid burn-through. Moving the torch quickly helps control heat.
Filler material should match the base metal closely. Use a pulsed TIG setting to reduce warping and distortion. Clean the metal surface thoroughly to prevent contamination. Thin aluminum needs delicate handling for strong welds.
Complex Joint Configurations
Complex joints demand precise positioning and steady hand control. Common joints include T-joints, lap joints, and corner welds. Each requires different torch angles and filler feed techniques.
Maintain a consistent arc length to avoid porosity. Use backing bars or chill plates to support the weld area. Plan the weld sequence to minimize stress and distortion. Skilled welders adapt their technique to each joint type.
Multi-pass Welding
Multi-pass welding adds strength to thick aluminum sections. Clean each pass before applying the next to avoid defects. Control heat input to prevent warping and cracking.
Use a weaving motion to fill wide joints evenly. Monitor interpass temperature to protect metal integrity. Multi-pass welds require patience and steady control. Proper technique ensures a strong, smooth final weld.
Frequently Asked Questions
What Equipment Is Needed For Tig Welding Aluminum?
You need a TIG welder with AC capability, a tungsten electrode, argon gas, and aluminum filler rods. Proper safety gear is essential too.
How Do You Prepare Aluminum For Tig Welding?
Clean aluminum thoroughly to remove oxide layers using a stainless steel brush or chemical cleaner. Proper cleaning ensures a strong weld.
What Is The Ideal Tungsten Size For Aluminum Tig Welding?
A 1/16-inch or 3/32-inch pure tungsten or zirconiated tungsten electrode works best for most aluminum TIG welding tasks.
How Do You Control Heat During Aluminum Tig Welding?
Use AC current with balanced cleaning action and adjust amperage to avoid overheating or warping aluminum metal.
Conclusion
Welding aluminum with TIG takes practice and care. Use clean materials and steady hands. Control heat to avoid warping or holes. Choose the right filler metal for strong joints. Keep your work area safe and well-ventilated. With patience, your welds will look smooth and last long.
Small steps lead to better skills and results. Keep trying, and you will improve every time.
About The Author

