
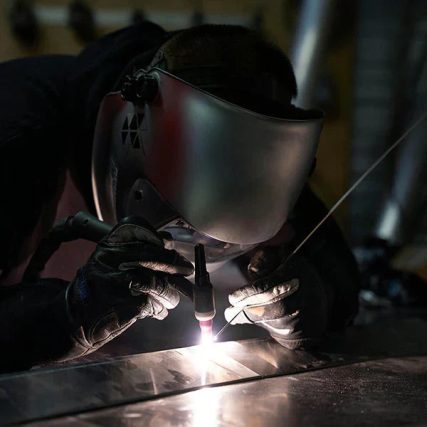
Welding cast iron can feel like a tough challenge, but with the right technique, you can master it using a TIG welder. If you’ve ever struggled with cracked pipes, broken engine parts, or old cookware, this guide is made for you.
You’ll discover simple steps that make welding cast iron easier and more reliable. By the end, you’ll have the confidence to fix your cast iron pieces yourself, saving time and money. Ready to unlock the secrets of TIG welding cast iron?
Let’s dive in.
Essentials Of Cast Iron Welding
Welding cast iron with a TIG welder requires more than just basic skills. Understanding the material’s nature and the obstacles you might face sets the foundation for successful welding. Knowing what makes cast iron unique helps you choose the right approach and avoid common mistakes.
Properties Of Cast Iron
Cast iron is a brittle metal with high carbon content, usually between 2% and 4%. This carbon makes it hard but also prone to cracking under heat stress. Its thermal conductivity is low, so heat doesn’t spread quickly, causing localized expansion and contraction during welding.
Another key property is its porous surface, which can trap impurities. This can affect the weld quality if not cleaned properly. You’ll also notice cast iron cools quickly, increasing the risk of weld cracks if cooling isn’t controlled.
Challenges In Welding Cast Iron
One major challenge is dealing with the metal’s brittleness. Applying too much heat too fast causes the cast iron to crack. Controlling the heat input and preheating the workpiece often becomes necessary to prevent this.
Another difficulty is the formation of hard, brittle phases in the weld zone. These phases can weaken the joint and lead to failure under stress. Proper filler material selection and welding technique play a crucial role in minimizing this risk.
Have you ever faced unexpected cracking after welding cast iron? This usually happens when the cooling process is too rapid or uneven. Managing the cooling rate by slow cooling or using insulating blankets can help you avoid this problem.
Credit: www.weldingweb.com
Choosing The Right Equipment
Choosing the right equipment is crucial when welding cast iron with a TIG welder. The wrong tools can lead to weak joints or even damage the material. You want gear that offers precision and control, especially since cast iron requires careful heat management to avoid cracking.
Selecting A Tig Welder
Not every TIG welder is suitable for cast iron. Look for a machine with adjustable amperage and pulse settings. These features help you control the heat input, which is key to preventing the cast iron from overheating and cracking.
Consider a TIG welder with AC/DC capability. While DC is commonly used for most metals, AC settings help clean the cast iron surface during welding. A welder with a high-frequency start will also make your job easier by providing a stable arc without touching the workpiece.
Recommended Filler Materials
Choosing the right filler material affects the strength and durability of your weld. Nickel-based filler rods are often the best choice for cast iron because they offer excellent compatibility and reduce the risk of cracking.
- Nickel 99%– Ideal for most cast iron repairs, providing good strength and flexibility.
- Nickel-iron alloys– Better for welding cast iron to steel or other metals, offering good fusion and toughness.
- Silicon bronze– Sometimes used but requires careful heat control and technique.
Have you tested different filler rods to see which one works best with your specific cast iron piece? Small trials can save you from costly mistakes on critical projects.
Preparation Steps
Preparing cast iron for TIG welding is crucial for a strong, clean weld. Proper preparation minimizes cracks and weak spots. It also improves the welding process and final results.
Cleaning The Surface
Remove all dirt, oil, and rust from the cast iron surface. Use a wire brush or grinder for best results. Clean the area around the weld to avoid contamination. Wipe the surface with a solvent like acetone to remove grease. A clean surface ensures better weld penetration and strength.
Preheating Techniques
Preheat the cast iron to reduce thermal shock. Heat slowly and evenly using an oven or torch. Aim for a temperature between 300°F and 500°F (150°C to 260°C). Use a temperature gauge to monitor heat levels. Preheating helps prevent cracks and warping during welding.

Credit: www.reliance-foundry.com
Tig Welding Techniques
TIG welding cast iron requires precise control and a steady hand. The techniques you use can make a big difference in the strength and appearance of your welds. Understanding how to adjust your settings and follow the right process tips helps you avoid common pitfalls like cracking or poor fusion.
Adjusting Settings For Cast Iron
Start by setting your TIG welder to DCEN (Direct Current Electrode Negative). This provides deeper penetration, which is essential for the dense structure of cast iron. Use a low amperage setting to prevent overheating and cracking.
Choose a welding speed that lets you maintain control but doesn’t let the heat build up too much. A slower speed can cause the metal to become brittle, while going too fast might result in weak welds.
Don’t forget to select the right filler rod, typically nickel-based, for better compatibility with cast iron. This helps reduce the risk of weld failure. Adjust your gas flow to around 15-20 CFH to protect the weld pool without causing turbulence.
Welding Process Tips
Keep your torch angle around 70 degrees to the workpiece, which allows for a clear view of the weld pool. Use a foot pedal or fingertip control to adjust amperage smoothly during the weld.
Apply heat evenly and avoid holding the torch in one spot too long. Cast iron is prone to cracking if it gets too hot in one area. If you notice discoloration or smoke, reduce your heat immediately.
After welding, don’t cool the cast iron rapidly. Slow cooling helps reduce thermal stress and prevents cracks. You might want to wrap the piece in a heat-resistant blanket or place it in an insulated container to cool gradually.
Have you ever noticed how small adjustments in your welding speed or angle can change the quality of your weld? Experiment with these factors on scrap pieces before tackling your main project. This hands-on approach sharpens your skills and builds confidence.
Post-welding Procedures
After you’ve completed welding cast iron with your TIG welder, the job isn’t done just yet. Post-welding procedures are crucial to ensure the strength and durability of the weld. How you handle the cooling and inspection stages can make a big difference in the final outcome.
Cooling Down Methods
Cast iron is prone to cracking if it cools too quickly. You want to avoid sudden temperature changes that stress the metal. One reliable way is to let the piece cool naturally at room temperature, away from drafts or cold surfaces.
Some welders wrap the welded area with insulating materials like a firebrick or ceramic blanket. This slows the cooling process and reduces the risk of cracks. Have you tried using sand as a cooling medium? Burying the weld in dry sand can also keep the temperature steady.
Inspecting The Weld
Once the weld has cooled, take a close look at the joint. Check for any visible cracks or porosity in the weld bead. These flaws can weaken the bond and cause failure later on.
Using a magnifying glass or even a dye penetrant test can help reveal hidden defects. Don’t forget to tap the weld lightly with a hammer to listen for any hollow sounds indicating internal cracks. What do you look for first when inspecting your welds?
Common Mistakes To Avoid
Welding cast iron with a TIG welder is a skill that demands precision and care. Many welders struggle not because of the equipment, but due to common mistakes that can ruin the whole job. Recognizing these errors early can save you time, money, and frustration.
Avoiding Cracks
Cracking is the most frequent issue when welding cast iron. This happens because cast iron is brittle and doesn’t handle heat changes well. You need to preheat the metal slowly to reduce thermal shock.
Try heating the piece to around 500°F (260°C) before welding and keep it warm during the process. After welding, allow the workpiece to cool down gradually, ideally wrapped in insulation like a firebrick or blanket. Rapid cooling often leads to cracks, which can ruin your project.
Think about how you handle the heat. Have you ever rushed welding without preheating? That impatience usually ends with cracks. Your patience in temperature control will pay off.
Preventing Distortion
Distortion changes the shape of your cast iron piece and is frustrating to fix. It occurs when heat causes uneven expansion and contraction. To prevent this, control your heat input carefully.
Use short welds spaced apart rather than long continuous beads. This allows the metal to cool slightly between welds and reduces stress buildup. Clamping your workpiece firmly also helps keep it stable during welding.
Consider your welding sequence as well. Welding on one side only can pull the metal out of shape. Alternate your welds to balance the heat and avoid warping.
Have you noticed your workpiece warping after welding? Adjusting your technique to manage heat can stop this problem before it starts.
Expert Recommendations
Welding cast iron with a TIG welder demands more than just technical skill—it requires the right mindset and equipment. Expert welders know that success hinges on preparation and safety as much as on technique. Here’s what seasoned professionals recommend to get the best results and keep yourself protected.
Professional Tools And Accessories
Using the right tools makes a world of difference. Experts suggest a TIG welder with adjustable amperage control to handle the delicate heat requirements of cast iron. A high-frequency start feature helps create a clean arc without contaminating the material.
Choose nickel-based filler rods specifically designed for cast iron. These rods provide strong, crack-resistant welds and match the metal’s thermal expansion closely. Additionally, a good set of clamps and heat sinks can control distortion during welding.
Don’t overlook preheating equipment. Preheating the cast iron to about 500°F reduces stress and cracking risk. Many professionals use an electric or propane torch for this, ensuring even heat distribution.
Safety Precautions
Welding cast iron generates intense heat and harmful fumes, so safety can’t be an afterthought. Always wear a welding helmet with the appropriate shade to protect your eyes from the bright arc and UV radiation.
Use flame-resistant gloves and clothing to shield your skin from sparks and hot metal. Ventilate your workspace well or use a fume extractor to avoid inhaling toxic gases released during welding.
Have a fire extinguisher nearby. Cast iron can store heat, leading to unexpected fires even after you finish welding. Ask yourself—are you fully prepared to handle emergencies before starting?

Credit: www.youtube.com
Frequently Asked Questions
What Type Of Tig Filler Rod Is Best For Cast Iron?
Use a nickel-based TIG filler rod for cast iron. It offers excellent strength and flexibility. This rod prevents cracking during cooling. It’s the most reliable choice for welding cast iron with a TIG welder.
How To Prepare Cast Iron Before Tig Welding?
Clean the cast iron thoroughly to remove dirt, oil, and rust. Preheat the metal to 500-1200°F to reduce thermal shock. Proper preparation ensures better weld penetration and minimizes cracking risks during TIG welding.
Can Tig Welding Fix Cast Iron Cracks?
Yes, TIG welding can repair cast iron cracks. Use slow, controlled heat and nickel filler rods. Preheat and post-weld cooling are essential. This method restores strength and extends cast iron’s lifespan effectively.
What Settings Are Ideal For Tig Welding Cast Iron?
Use low amperage and AC or DCEN settings on your TIG welder. Keep the heat input moderate to avoid overheating. Adjust the pulse frequency for better control and weld quality on cast iron.
Conclusion
Welding cast iron with a TIG welder takes patience and care. Use the right filler rod and low heat to avoid cracks. Clean the metal thoroughly before starting the weld. Take your time and control the heat well. Practice helps you improve and get better results.
Keep safety gear on at all times. With these tips, you can weld cast iron more confidently. Try small projects first to build skill. Welding cast iron is possible with the right approach.
About The Author

