
Welding with a wire welder might seem tricky at first, but once you know the right steps, it becomes simple and even enjoyable. If you want to create strong, clean welds quickly, this guide is made just for you.
Imagine finishing your project faster and with confidence, knowing your welds will hold up. Keep reading, and you’ll discover easy tips and tricks that will turn you into a skilled welder in no time. Your next great welding project starts here.
Credit: yeswelder.com
Choosing The Right Wire Welder
Choosing the right wire welder is crucial for strong, clean welds. Different projects need different welders. Factors like material type, thickness, and welding environment affect your choice. Understanding the options helps you pick a welder that fits your needs and budget.
Types Of Wire Welders
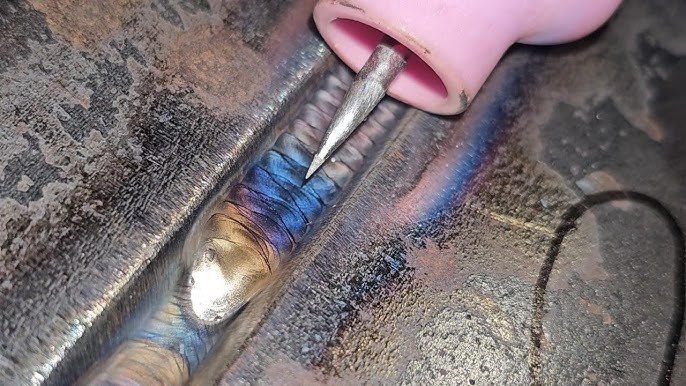
Wire welders come in several types. MIG welders use a continuous wire fed through a gun. They work well on thin to medium metals. Flux-cored welders use a special wire with flux inside. They perform better outdoors and on rusty metals. TIG welders use a tungsten electrode and separate filler wire. They offer precise control for thin metals and detailed work.
Selecting The Right Wire
Choosing the right wire affects weld quality and strength. Solid wire is common for clean, smooth welds. Flux-cored wire works better in windy or dirty conditions. Wire diameter matters too. Thinner wire suits thin metals, while thicker wire handles heavy metal. Match wire type and size to the metal and welder for best results.
Power Source Options
Wire welders use different power sources. Some run on standard household electricity (110V). They are portable and easy to use for small jobs. Others need higher voltage (220V) for heavier work. Higher power welders handle thicker metals and continuous use. Choose a power source that matches your workspace and project demands.
Setting Up Your Welder
Setting up your wire welder correctly is crucial for a smooth welding experience and strong, clean welds. It’s more than just plugging in your machine; careful adjustments and preparation can save you time and frustration. Let’s dive into what you need to do before striking your first arc.
Adjusting Voltage And Wire Speed
Your wire welder’s performance depends heavily on the right voltage and wire speed settings. Too high voltage can cause excessive spatter and burn-through, while too low can lead to weak welds. Start with the manufacturer’s recommendations but be ready to tweak based on the thickness of your metal and the welding position.
Wire speed controls how fast the wire feeds into the weld pool. If it’s too fast, you’ll get a messy weld; too slow, and the arc may sputter or stop. Try small adjustments and test welds on scrap metal to find that perfect balance for your project.
Preparing The Work Area
A clean and organized work area makes welding safer and more efficient. Remove any flammable materials and ensure your metal pieces are free from rust, paint, or oil. These contaminants can weaken your weld and produce harmful fumes.
Consider your lighting and ventilation too. Good lighting helps you see the weld pool clearly, and proper ventilation keeps harmful gases away from your breathing zone. Have a fire extinguisher handy—accidents happen faster than you think.
Safety Gear Essentials
Never skip on safety gear—it’s your best defense against burns, sparks, and harmful UV rays. At minimum, wear a welding helmet with the right shade, flame-resistant gloves, and a long-sleeve jacket. Think about your footwear too; leather boots provide better protection than sneakers.
Eye protection is critical, even if you’re just grinding or chipping slag. And don’t forget ear protection in noisy environments. Are you fully covered before you start? Your future self will thank you for the precautions you take today.
Preparing The Metal
Preparing the metal properly is crucial before you start welding with a wire welder. It sets the stage for a strong, clean weld and prevents common issues like weak joints or excessive spatter. Taking the time to get your metal ready saves you from headaches down the road and ensures your project turns out exactly how you want.
Cleaning And Surface Prep
Make sure your metal is free from rust, paint, oil, and dirt. These contaminants can cause poor weld quality and create weak spots. Use a wire brush, grinder, or chemical cleaner to get the surface spotless.
Have you ever noticed welds that look bubbly or inconsistent? Often, that’s because the metal wasn’t clean enough. Your weld will flow better and stick stronger on a clean surface.
Clamping And Positioning
Hold your metal pieces firmly in place using clamps or magnets. Movement during welding leads to misaligned joints and weak connections. Position your work so you have good access and a stable angle for your wire welder.
Think about how you hold a pen—steady and comfortable. Your metal needs the same stability. You’ll weld more precisely and safely when the pieces don’t shift.
Joint Types And Fit-up
Understand the type of joint you’re working with—be it butt, lap, or T-joint. Each requires a specific fit-up to ensure the weld penetrates properly. Make sure edges line up with minimal gaps, or adjust your welding technique accordingly.
Ever tried to glue two uneven surfaces together? It doesn’t hold well. The same principle applies to welding. A tight, well-fitted joint helps create a stronger, cleaner weld that lasts.
Welding Techniques
Mastering welding techniques is essential to achieve strong, clean welds with your wire welder. Each step requires focus and precision, and small adjustments can make a big difference. Let’s break down the key techniques that will help you weld like a pro.
Starting The Arc
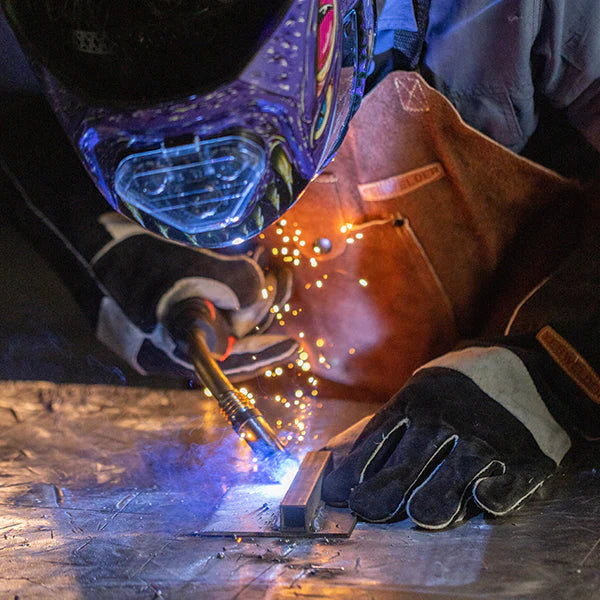
Starting the arc correctly sets the foundation for a good weld. Hold the welding gun close to the metal surface and briefly touch the tip to create a spark. Pull the gun back slightly once the arc ignites to maintain a stable arc without sticking.
Have you noticed how a shaky start often leads to weak welds? Practice steady hand movements to avoid interruptions or excessive spatter right from the beginning.
Maintaining Proper Angle And Distance
Keeping the correct angle and distance between the welding gun and the workpiece is crucial. Aim to hold the gun at about a 15-degree angle from vertical for most welds.
Distance matters too—keep the nozzle 3/8 to 1/2 inch away from the surface. Too close, and you risk sticking; too far, and the arc becomes unstable. This balance controls heat and bead shape.
Controlling Travel Speed
Your travel speed affects the weld’s strength and appearance. Moving too fast can cause weak, narrow beads, while moving too slow may lead to excessive buildup or burn-through.
Find a rhythm that allows the molten pool to stay consistent without spreading too thin or piling up. Pay attention to the weld pool’s size as your guide—can you keep it steady without rushing or dragging?
Common Challenges And Fixes
Welding with a wire welder brings its own set of challenges that can affect the quality of your welds. Knowing how to spot and fix these common issues quickly will save you time and improve your results. Let’s dive into some problems you might face and how to handle them effectively.
Avoiding Porosity
Porosity shows up as tiny holes in your weld, weakening it significantly. It usually happens when moisture or contaminants get trapped during welding.
To prevent porosity, make sure your metal surfaces are clean and dry before starting. Wipe off oil, rust, or paint, and keep your work area free from drafts that can blow shielding gas away.
Check your gas flow rate; too little or too much can cause porosity. I once ignored this and ended up with a weak weld that cracked under pressure—don’t make the same mistake.
Preventing Burn-through
Burn-through occurs when you melt right through the metal, creating holes instead of a solid weld. It’s common with thin materials or high heat settings.
Lower your voltage and wire feed speed to control heat input. Use a steady hand and keep your welding gun moving at a consistent pace.
Think about the thickness of the metal. If your settings don’t match, you’ll either burn through or have a weak weld. Have you adjusted your machine for different metal gauges?
Handling Wire Feed Issues
Wire feed problems can disrupt your weld, causing inconsistent arcs or wire jams. This often happens due to incorrect tension or dirty feed rolls.
Regularly clean and inspect your wire feed system. Adjust the tension so the wire feeds smoothly without slipping or sticking.
If you notice the wire stuttering or popping, try swapping the contact tip and liner—they wear out faster than you’d expect.

Credit: www.arccaptain.com
Post-weld Tips
After welding with a wire welder, the job is not yet done. Post-weld care ensures strong, lasting joints. Proper handling protects your work and improves safety. Follow these key steps to finish your welding process well.
Inspecting Weld Quality
Check the weld for cracks, holes, or uneven surfaces. Look for consistent bead shape and smooth edges. Use a flashlight to see small flaws. Tap the weld gently to hear any hollow sounds. A good weld feels solid and uniform.
Cleaning And Finishing
Remove slag and spatter using a wire brush or chipping hammer. Clean the weld area with a cloth to remove dust and debris. Sand the surface if needed to smooth rough spots. This helps paint or coating stick better. Always wear gloves and safety glasses while cleaning.
Troubleshooting Defects
Identify common defects such as porosity, cracks, or weak spots. Porosity looks like tiny holes caused by trapped gas. Cracks may form from too much heat or poor technique. Weak spots happen when the weld lacks penetration. Adjust settings or technique to fix these issues before welding again.
Advanced Welding Tips
Advanced welding techniques improve the quality and strength of your welds. These tips help you handle complex projects with precision. Understanding these methods makes your welding safer and more efficient.
Multi-pass Welding
Multi-pass welding uses several layers of weld beads to fill thick joints. It strengthens the weld and prevents cracks. Each pass must cool slightly before the next one starts. Keep the welding angle steady for uniform layers. Clean between passes to remove slag and debris. This process creates a durable, high-quality weld.
Using Shielding Gas Effectively
Shielding gas protects the weld from air contamination. Use the right gas type for your metal and welding process. Adjust the gas flow rate to avoid turbulence or gas loss. Ensure your gas nozzle is clean and free from blockages. Proper shielding reduces spatter and produces a smooth weld bead. Always check for leaks in your gas supply system.
Welding Different Metals
Different metals need specific welding settings and filler materials. Adjust the wire speed and voltage to match the metal type. Preheat thick or high-carbon metals to avoid cracking. Use compatible filler wire to ensure strong welds. Clean each metal surface thoroughly before welding. Mixing metals without proper technique can cause weak joints or defects.
Credit: m.youtube.com
Frequently Asked Questions
What Safety Gear Is Needed For Wire Welding?
Always wear a welding helmet, gloves, and flame-resistant clothing. Use safety glasses and ensure proper ventilation to avoid fumes. This gear protects you from sparks, UV rays, and harmful gases during wire welding.
How Do I Prepare Metal Before Welding?
Clean the metal surface thoroughly by removing rust, paint, and grease. Use a wire brush or grinder for best results. Proper preparation ensures strong, clean welds and prevents contamination during the welding process.
What Settings Are Best For Wire Welder Use?
Adjust voltage and wire feed speed based on metal thickness and type. Start with manufacturer recommendations, then fine-tune for smooth arc and minimal spatter. Correct settings improve weld quality and efficiency.
Can Beginners Easily Learn Wire Welding?
Yes, wire welding is beginner-friendly due to its continuous wire feed and simple controls. Practice steady hand movement and maintain proper distance for better results. Learning basics ensures safer and stronger welds.
Conclusion
Welding with a wire welder is accessible and rewarding. Start with basic safety gear. Practice regularly for consistent results. Choose the right wire and settings. Follow the steps we discussed. Patience is key to improving your skills. Troubleshoot common issues as they arise.
Always focus on safety and precision. The more you weld, the better you’ll get. Engage with fellow welders for tips and advice. Keep exploring new techniques and materials. Enjoy the process of creating and fixing with metal. This skill opens up many possibilities.
Happy welding!
About The Author

