Are you ready to master a skill that can open up endless possibilities for your projects? Learning how to weld with wire feed can transform the way you build, fix, and create.
Whether you’re a beginner or just looking to improve, this method offers precision and control that makes welding easier and more efficient. In this guide, you’ll discover simple steps and expert tips that will boost your confidence and help you achieve strong, clean welds every time.
Keep reading, and you’ll soon see how welding with wire feed can become your new favorite technique.

Credit: yeswelder.com
Choosing The Right Wire Feed Welder
Choosing the right wire feed welder plays a key role in welding success. The right machine makes the process smoother and the welds stronger. It depends on the type of projects, material thickness, and power availability. Picking a welder that fits your needs saves time and money. Consider the wire type, machine type, and power source carefully. These factors affect weld quality and ease of use.
Types Of Wire Feed Welders
Wire feed welders come in several types. The most common are MIG (Metal Inert Gas) and flux-cored welders. MIG welders use a shielding gas to protect the weld. Flux-cored welders use a special wire with a flux core that creates gas when heated. MIG welders work well for thin metals and clean surfaces. Flux-cored welders handle thicker metals and dirty or rusty surfaces. Choose based on the metal type and environment.
Selecting Wire Diameter
Wire diameter affects weld strength and control. Smaller diameters suit thin metals and precise work. Larger diameters suit thicker metals and faster welding. Common wire sizes range from 0.023 inches to 0.045 inches. Match wire size to metal thickness and welder settings. The wrong diameter can cause poor welds or machine jams. Consider the type of welding and material for best results.
Power Source Considerations
Power source impacts welder portability and performance. Welders use either AC or DC power. DC offers smoother arcs and better control. AC welders may cost less but produce rougher welds. Check power availability at your worksite. Some welders run on standard household outlets, others need higher voltage. Choose a power source that fits your workspace and welding needs.
Essential Safety Gear
Welding with wire feed can be a rewarding skill, but it comes with risks that demand your full attention to safety gear. Your protection isn’t optional—it’s essential for every welding session. Proper safety gear shields you from sparks, intense heat, and harmful fumes, keeping you safe and confident while you work.
Protective Clothing
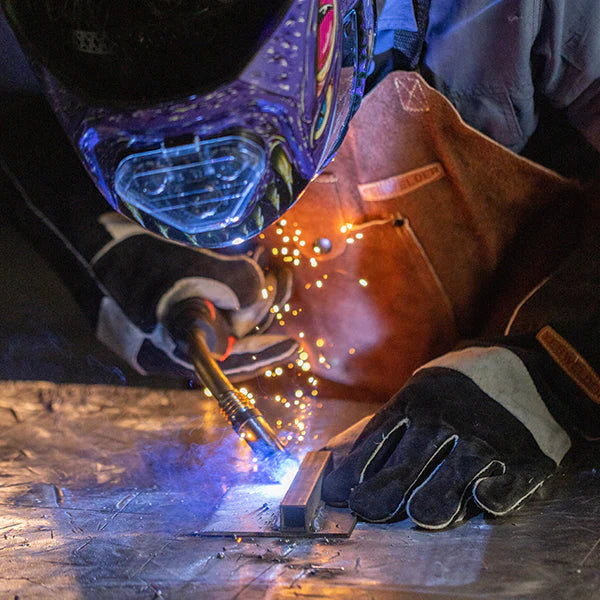
Wear flame-resistant clothing made from heavy cotton or leather to guard against sparks and hot metal splatter. Avoid synthetic fabrics that can melt and stick to your skin. Long sleeves, pants, and gloves are a must to cover every inch of exposed skin.
I once underestimated the importance of protective clothing and ended up with a painful burn. That experience made me switch to high-quality welding jackets and gloves, which made all the difference in comfort and safety. Have you checked your gear’s material lately?
Eye And Face Protection
Your eyes are vulnerable to intense UV and infrared light from the welding arc. Always use a welding helmet with the correct shade filter to protect your vision. Don’t forget a clear safety shield or goggles underneath for extra defense against flying debris.
It’s tempting to lift your helmet quickly to check your work, but even a brief exposure can cause “arc eye,” a painful condition. Consider helmets with auto-darkening features—they adjust instantly, saving you from repeated exposure.
Ventilation And Respiratory Safety
Welding produces fumes and gases that can be harmful if inhaled. Make sure your workspace has good ventilation—open windows, fans, or a dedicated exhaust system help clear the air. If ventilation is limited, wearing a respirator designed for welding is critical.
Ignoring ventilation can lead to headaches, dizziness, or worse over time. I always set up a portable fume extractor near my work area now, and it’s made breathing easier and work sessions longer without fatigue. How do you manage the air quality where you weld?
Preparing Materials For Welding
Preparing materials for welding is key to a strong, clean weld. Proper prep helps avoid common defects and ensures the weld holds well. Focus on cleaning, joint design, and positioning before welding starts.
Cleaning And Surface Prep
Remove dirt, rust, oil, and paint from the metal surface. Use a wire brush, grinder, or chemical cleaner for best results. Clean surfaces allow better electrical contact and reduce impurities in the weld. Always check for moisture or grease as these can cause weld defects.
Joint Design And Fit-up
Select the right joint type for your project, such as butt, lap, or T-joint. Ensure the edges are cut clean and fit tightly together. Proper gap and angle improve weld penetration and strength. Use a square or angle gauge to check alignment before welding.
Clamping And Positioning
Secure metal pieces with clamps or magnets to keep them steady. Correct positioning prevents movement during welding. Stable joints reduce warping and improve weld quality. Arrange the workpiece to allow easy access for the welding torch.

Credit: weldmongerstore.com
Setting Up The Welder
Setting up the welder correctly ensures smooth welding and strong joints. It involves fine-tuning the wire feed speed, voltage, amperage, and selecting the right shielding gas. Proper setup prevents common welding problems like spatter, poor bead shape, and weak welds.
Adjusting Wire Speed
Wire speed controls how fast the wire feeds into the weld pool. Too fast causes excessive spatter and weak welds. Too slow can result in poor penetration and a weak joint. Start with a medium speed and adjust based on the weld bead appearance. Look for a smooth, steady arc without popping or sputtering.
Setting Voltage And Amperage
Voltage controls the arc length and heat of the weld. Amperage affects the melting of the wire and base metal. Higher voltage creates a longer arc and wider bead. Higher amperage melts wire faster but can cause burn-through. Match settings to the metal thickness and wire diameter for the best results.
Selecting Shielding Gas
Shielding gas protects the weld from contamination. Common gases include:
- Argon – good for thin metals and clean welds
- CO2 – offers deeper penetration but more spatter
- Argon-CO2 mix – balances smooth arc and penetration
Choose the gas based on the metal type and welding position. Proper gas flow rate also ensures clean welds without porosity.
Welding Techniques
Welding with wire feed requires specific techniques to produce clean and strong welds. Proper technique ensures good penetration and smooth bead appearance. Small changes in angle or speed can affect the weld quality.
Understanding key welding techniques helps in controlling the weld pool and avoiding defects. Practice and attention to detail improve both safety and results.
Correct Gun Angle And Travel Speed
Hold the welding gun at a 10 to 15-degree angle from vertical. This angle directs the wire and shielding gas correctly. Moving the gun too steep or flat weakens the weld.
Maintain a steady travel speed to allow proper metal fusion. Moving too fast creates gaps and weak spots. Moving too slow causes excess build-up and burns through the metal.
Maintaining A Steady Work Pace
Keep a consistent pace while welding. Sudden changes cause uneven weld beads and weak joints. A smooth rhythm helps control the weld pool size.
Take short breaks if needed. Fatigue leads to shaky hands and poor weld quality. Staying calm and focused improves results.
Avoiding Common Welding Defects
Watch for these common defects:
- Porosity: Gas bubbles trapped in the weld cause holes.
- Spatter: Small metal droplets scatter around the weld.
- Undercut: Grooves form along the weld edges.
- Lack of fusion: Weld metal does not properly join base metals.
Use the right settings, angle, and speed to prevent these issues. Inspect each weld closely and fix problems early.
Post-welding Steps
After completing the welding process, several important steps follow to ensure a strong and clean weld. These post-welding steps help improve durability and appearance. They also prepare the welded piece for its intended use or further work.
Cooling And Inspection
Allow the welded metal to cool naturally to avoid cracking. Avoid rapid cooling with water or air, as it can weaken the weld. Once cooled, inspect the weld visually for any cracks or gaps. Use a magnifying glass or bright light to see details clearly. Check for proper fusion between the base metal and weld bead.
Cleaning Welds
Remove slag, spatter, and any residue left on the weld surface. Use a wire brush or grinder to clean the area carefully. Cleaning improves the weld’s strength and prepares it for painting or coating. Clean welds also help spot any hidden defects.
Repairing Imperfections
Identify any flaws such as cracks, porosity, or undercuts. Small defects can be fixed by grinding out the imperfection and rewelding the area. Larger problems may require cutting out the bad section and welding new metal. Repairing imperfections increases the safety and lifespan of the weld.
Troubleshooting Tips
Troubleshooting wire feed welding can improve your results and reduce frustration. Common issues like wire feed problems, porosity, and spatter affect weld quality. Understanding these problems helps you fix them quickly. Here are some simple tips to solve typical welding challenges.
Wire Feed Issues
Wire feed problems often cause uneven welding. The wire might stop feeding or feed too fast.
- Check the drive rolls for wear or dirt. Clean or replace if needed.
- Ensure the wire spool is tight and free to turn.
- Adjust the tension on the wire feed mechanism to avoid slipping.
- Use the correct wire size for your machine.
- Inspect the contact tip for wear and replace it if the wire jams.
Porosity Problems
Porosity creates small holes in the weld, weakening it. It happens when gas is trapped in the weld pool.
- Check for leaks in the shielding gas supply.
- Use the right type and flow rate of shielding gas.
- Clean the metal surface to remove rust, oil, or paint.
- Keep the welding area free from drafts or wind.
- Adjust welding speed to avoid trapping gas.
Spatter Control
Spatter is small drops of molten metal that stick around the weld. It makes the work messy and hard to finish.
- Lower the welding voltage to reduce spatter.
- Keep the correct distance between the nozzle and the workpiece.
- Use anti-spatter spray on the surface and nozzle.
- Check and adjust wire feed speed for smooth welding.
- Choose the right wire and gas combination for your project.

Credit: www.fronius.com
Advanced Welding Tips
Mastering wire feed welding means pushing beyond the basics. Advanced techniques help you create stronger, cleaner welds and handle more complex projects with confidence. Let’s dive into some tips that can elevate your skills and improve your results.
Multi-pass Welding
Multi-pass welding is essential when working with thick metals or when you want extra strength. Instead of one heavy bead, you add several thinner layers, allowing better control over heat and penetration.
Each pass should be cleaned before the next, removing slag or impurities. This prevents defects and creates a more solid bond. Have you noticed how skipping cleaning leads to weak spots? That’s why this step matters.
Keep your travel speed consistent for uniform layers. Slow down on corners to avoid undercut. Your patience here pays off with a durable weld.
Welding Different Metals
Welding dissimilar metals can be tricky because each metal reacts differently to heat and filler wire. Choosing the right filler wire is critical to avoid cracks or weak joints.
Preheat the metals if needed; aluminum and steel, for example, have different expansion rates. Too much heat causes warping, too little results in poor fusion.
Try practicing on scrap pieces to find the best settings before tackling your actual project. Have you experimented with different filler wires to see what works best? Testing saves time and frustration.
Optimizing Weld Strength
To get the strongest weld, start with clean, rust-free metal. Contaminants cause porosity and weak points.
Adjust your wire feed speed and voltage carefully. Too fast can create excess spatter; too slow leads to weak penetration. Aim for a smooth, steady arc.
Consider your weld bead shape—flat and slightly convex beads spread stress better. How often do you check your settings during a job? Small tweaks make a big difference in strength.
Frequently Asked Questions
What Is Wire Feed Welding?
Wire feed welding, also known as MIG welding, uses a continuously fed wire electrode. This method is efficient and ideal for welding thicker materials. The process involves feeding the wire from a spool through a welding gun. It creates a strong and clean weld with minimal cleanup.
How Do You Set Up A Wire Feed Welder?
Setting up a wire feed welder involves connecting the machine to a power source. Load the wire spool and adjust the tension. Set the appropriate voltage and wire speed for your material. Attach the grounding clamp securely to your workpiece.
Ensure all connections are tight and secure before starting.
What Type Of Wire Is Used In Wire Feed Welding?
Wire feed welding typically uses solid or flux-cored wires. Solid wire is used with shielding gas, while flux-cored wire doesn’t require gas. Choose wire based on your material and project requirements. Common wire types include ER70S-6 for mild steel and stainless steel wire for stainless applications.
Can Beginners Learn Wire Feed Welding Easily?
Yes, beginners can learn wire feed welding fairly easily. It offers a user-friendly setup and operation. The continuous wire feed and straightforward controls make it accessible. Beginners should start with practice on scrap metal. This will help to develop skills before tackling more complex projects.
Conclusion
Welding with wire feed takes practice and patience. Start slow and focus on steady hand movements. Choose the right wire and settings for your project. Safety gear protects you while working. Keep your workspace clean and well-lit. With time, your welds will grow stronger and smoother.
Remember, every weld teaches you something new. Keep trying, and don’t rush the process. Welding can be a useful skill for many tasks. Enjoy the learning and the results you create.
About The Author
Jeff Grill
administrator
Hi, I’m Jeff Grill — a certified welding expert and instructor based in Long Island, NY.
With over three decades in the industry, I’m passionate about combining theoretical knowledge with hands-on experience to train the next generation of skilled welders.
I specialize in all forms of arc welding, including GMAW, GTAW, GMAW, FCAW & SAW. But my experience isn’t limited to just those—I’m also knowledgeable in oxyfuel gas welding and plasma arc cutting.
My years as a welding inspector and supervisor have honed my ability to ensure the highest standards in welding quality and safety, making me adept at executing and overseeing complex welding operations.

