
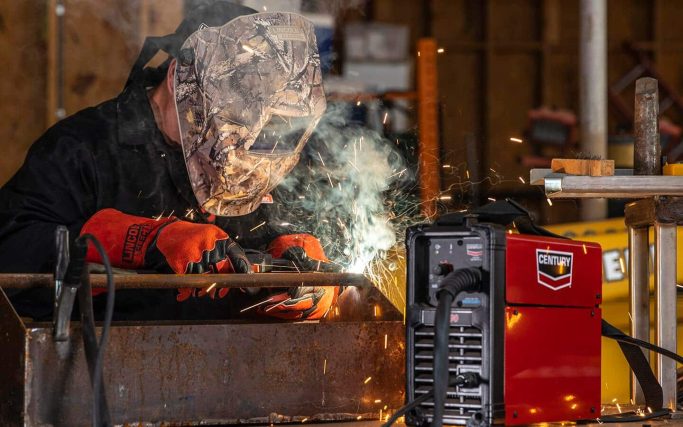
If you want to learn how to weld with a wire welder, you’ve come to the right place. Welding might seem tricky at first, but with the right steps and a bit of practice, you can create strong, clean joints like a pro.
Imagine the satisfaction of fixing or building metal projects on your own—saving money and gaining a valuable skill. You’ll discover simple, clear instructions that make wire welding easy to understand and follow. Ready to take your welding skills to the next level?
Let’s get started!

Credit: weldingsupplystoreutah.com
Choosing The Right Wire Welder
Choosing the right wire welder is crucial for achieving strong, clean welds and making your welding projects more enjoyable. The right equipment not only fits your skill level but also matches the type of work you want to do. Let’s break down what you need to consider so you can pick a wire welder that works best for your needs.
Types Of Wire Welders
Wire welders mainly come in two types: MIG (Metal Inert Gas) and Flux-cored welders. MIG welders use a shielding gas to protect the weld, making them ideal for indoor use and thin metals. Flux-cored welders, on the other hand, use a special wire that produces its own shielding, which works well outdoors and on rusty or dirty metals.
Think about where you’ll be welding most often. Are you working inside a garage or outside in the wind? This choice will help you decide which type fits your environment better.
Selecting Suitable Wire
The wire you use must match the metal type and thickness. For steel, ER70S-6 wire is common and reliable. Aluminum requires a different wire, usually softer and with a different diameter, like 4043 or 5356.
Wire diameter also matters; thinner wires (0.023” to 0.030”) are great for thin metals, while thicker wires (0.035” and above) handle heavier materials. Using the wrong wire can cause weak welds or damage your machine.
Power And Settings
Wire welders come with various power options, usually measured in amps. Make sure your welder can handle the thickness of the metal you plan to work on. For instance, 140-180 amps cover most home projects, but thicker steel needs more power.
Adjusting voltage and wire feed speed controls your weld quality. Start with manufacturer recommendations and tweak settings based on your weld bead appearance. Have you noticed how small changes in settings can drastically improve your weld?
Preparing For Welding
Preparing for welding sets the stage for a strong, clean weld. It helps avoid mistakes and keeps you safe. Careful preparation saves time and effort during welding. Follow these key steps before you start using your wire welder.
Cleaning The Metal Surface
Remove rust, paint, oil, and dirt from the metal. Use a wire brush or sandpaper to clean the area well. A clean surface ensures better weld quality and adhesion. Dirt and rust cause weak welds and defects.
Setting Up Safety Gear
Wear proper protective gear before welding. Use a welding helmet with a dark lens to protect your eyes. Put on flame-resistant gloves and a long-sleeve jacket. Ensure good ventilation or use a mask to avoid breathing fumes.
Adjusting Welder Settings
Check the wire welder’s voltage and wire feed speed. Match the settings to the metal type and thickness. Start with a lower voltage and increase if needed. Correct settings prevent burn-through and weak welds.
Welding Techniques
Mastering welding techniques is key to producing strong and clean welds with your wire welder. Each small adjustment you make—whether it’s how you hold the tool or how fast you move—can change the quality of your work. Let’s break down the essential techniques that will help you weld like a pro.
Positioning The Welder
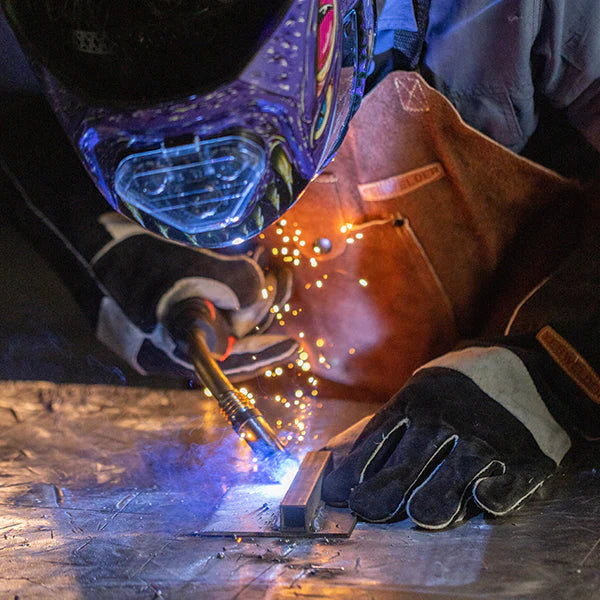
Your welder’s position affects both visibility and control. Hold the welder steady and close enough to see the weld pool clearly, but not so close that you risk contamination or overheating. I’ve found that positioning myself so the light from the arc hits the workpiece directly helps me maintain better focus and accuracy.
Try to keep your body comfortable and balanced. If you feel cramped or stretched, your weld might suffer. Have you noticed how small shifts in your stance change your welding precision?
Controlling The Speed
The speed at which you move the wire welder influences the bead’s appearance and strength. Moving too fast can cause weak, uneven welds, while going too slow might create excessive buildup or burn-through. I once slowed down just a bit on a tricky joint and saw a huge improvement in bead consistency.
Practice finding a rhythm that matches the thickness of your metal and wire feed rate. Pay attention to the weld pool size—it’s your visual cue for speed adjustment. What happens when you intentionally speed up or slow down on different metals?
Maintaining The Correct Angle
Keeping the correct angle between the wire welder and the workpiece is crucial. Typically, a 15 to 20-degree angle from vertical works best for most jobs. This angle helps direct the molten metal into the joint without causing spatter or weak spots.
Experiment with slight angle changes to see how the weld bead changes. When I adjusted my angle just a few degrees, I noticed smoother penetration and less cleanup afterward. How comfortable are you adjusting your angle during a weld?
Credit: yeswelder.com
Common Welding Mistakes
Making mistakes while welding with a wire welder can be frustrating and costly. Identifying common errors early can save you time and material. Let’s look at some typical problems welders face and how you can avoid them.
Overheating And Burn-through
Overheating happens when the heat setting is too high or you stay too long in one spot. This can cause the metal to melt excessively, leading to holes known as burn-through.
Have you ever noticed your workpiece turning brittle or warping? That’s a sign of overheating. To fix this, adjust your voltage and travel speed. Moving the torch steadily and keeping the heat balanced prevents damage and keeps your weld strong.
Poor Wire Feed
Poor wire feed can disrupt your weld and cause spatter or uneven beads. This usually happens if the wire is dirty, the spool tension is wrong, or the drive rolls are worn out.
Check your wire regularly and clean it if needed. Make sure the spool feeds smoothly without slipping or grinding. Proper maintenance of your wire feed system keeps your welding consistent and saves you from frustrating stoppages.
Inconsistent Weld Beads
Inconsistent weld beads are easy to spot but tricky to fix. They often result from varying travel speed, incorrect angle, or improper settings.
Ask yourself: are you holding the gun steady and moving at an even pace? Try practicing on scrap metal to develop a rhythm. Consistency in your technique produces cleaner, stronger welds that look professional every time.
Finishing And Inspecting Joints
Finishing and inspecting your weld joints is a crucial step that often gets overlooked. This phase ensures your work is not only strong but also safe and visually clean. Taking time here can save you from costly repairs or failures down the line.
Cleaning Welds
After welding, your joints may have slag, spatter, or discoloration that needs removal. Use a wire brush or grinder to clean the surface gently without damaging the weld bead. This helps you clearly see the weld’s condition and prepares it for any further treatment.
Have you noticed how a clean weld looks sharper and more professional? Cleaning also prevents contamination that could weaken your joint over time.
Checking For Defects
Inspect your welds for cracks, porosity, or undercutting by looking closely and feeling the surface. A simple visual check often reveals most issues. You might want to tap the weld gently with a hammer to listen for any hollow sounds indicating internal flaws.
Consider using a magnifying glass or even a dye penetrant test for a deeper inspection. Catching defects early means you can fix them before they become a real problem.
Post-weld Treatments
Applying post-weld treatments can improve the strength and longevity of your joints. Techniques like grinding smooth the weld, while heat treatments relieve stresses caused by welding.
Think about whether your project requires extra corrosion protection like painting or coating. Each treatment you add extends the life of your weld and makes your work stand out.

Credit: yzwelding.com
Advanced Tips For Perfect Joints
Perfect weld joints don’t just happen—they require attention to detail and smart techniques. If you want your wire welding projects to hold up under pressure, focusing on advanced tips can make a big difference. These tips will help you achieve stronger, cleaner, and more reliable joints every time you pick up your wire welder.
Using Backing Bars
Backing bars act as a support behind the weld joint, preventing molten metal from falling through. They help maintain the right shape and alignment of the weld pool, especially on thin materials. You can use copper or steel bars as backing, depending on your project’s needs.
Think about your last weld that had excess spatter or uneven penetration. Adding a backing bar could have stabilized the weld and improved the final result. Have you tried using backing bars in tight or awkward spots? They can be a game-changer when space limits your welding angle.
Multi-pass Welding
Multi-pass welding means laying several weld beads over each other to build up strength and fill gaps. It’s essential for thick materials where a single pass won’t create a strong joint. Each pass should be clean and consistent to avoid weak layers or trapped impurities.
When you work on a heavy steel frame, how do you ensure the weld doesn’t crack under stress? Adding multiple passes with proper cleaning between them keeps the joint tough and durable. You’ll notice better control over heat input and less warping with this approach.
Optimizing Gas Flow
Proper gas flow shields the weld from contaminants like oxygen and nitrogen, which cause porosity and weaken the joint. Adjust your gas flow rate based on the environment and material thickness—too high or too low can create problems. A good starting point is around 20-25 cubic feet per hour (CFH), but always test and adjust as needed.
Have you ever seen tiny holes in your weld bead? That’s a sign your gas coverage wasn’t sufficient. Try using a flowmeter and observe the gas nozzle regularly to prevent blockages or leaks. Small changes in gas flow can drastically improve weld appearance and strength.
Frequently Asked Questions
What Materials Can I Weld With A Wire Welder?
You can weld mild steel, stainless steel, and aluminum using a wire welder. Each material requires specific wire types and settings for optimal results.
How Do I Set The Correct Wire Feed Speed?
Adjust the wire feed speed based on material thickness and welding position. Too fast or slow speeds can cause weak or uneven welds.
What Safety Gear Is Essential When Welding With A Wire Welder?
Always wear a welding helmet, gloves, protective clothing, and safety glasses. Proper ventilation is also important to avoid inhaling harmful fumes.
How Do I Prepare Metal Before Welding With A Wire Welder?
Clean the metal surface from rust, paint, and oils. Proper preparation ensures strong welds and prevents contamination during the welding process.
Conclusion
Mastering wire welding takes practice and patience. Start with simple projects. Focus on safety first. Always wear protective gear. Keep your workspace clean and organized. Regularly check your equipment for wear and tear. Practice different welding techniques. This builds confidence over time.
Remember, mistakes are part of learning. Stay patient. Consistent practice improves skills. Don’t rush the learning process. Enjoy your welding journey. Create unique projects. Share your work with friends and family. They’ll love seeing your progress. Keep exploring new techniques.
Welding offers endless possibilities. Happy welding!
About The Author

