Welding can seem tricky at first, but once you know how to wire weld, you’ll unlock a powerful skill that makes your projects stronger and more professional. Whether you’re fixing something at home or starting a new build, mastering the basics of wire welding will save you time and money.
In this guide, you’ll discover simple steps and insider tips that anyone can follow. Ready to take control of your welding and create lasting bonds with confidence? Keep reading—you’re closer than you think to becoming a wire welding pro.

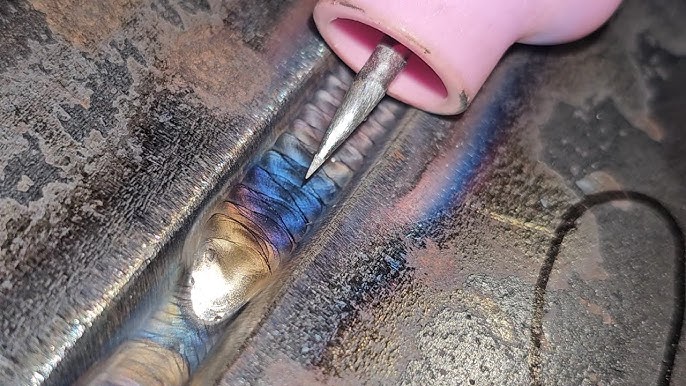
Credit: www.nature.com
Choosing The Right Wire
Choosing the right wire is key to successful wire welding. It affects the strength and quality of the weld. Picking the correct wire saves time and prevents weld defects. Understanding wire types, metal compatibility, and size helps you weld better.
Types Of Welding Wires
Welding wires come in different types for various welding processes. Common types include:
- Solid wires:Used in MIG welding, ideal for clean metals.
- Flux-cored wires:Contain flux for shielding, good for outdoor use.
- Metal-cored wires:Combine solid wire and flux, offer deep penetration.
- Aluminum wires:Special wires for aluminum welding.
Each type suits specific tasks. Choose based on your welding method and environment.
Matching Wire To Metal
Wire must match the metal you weld. This ensures strong, clean welds. For example:
- Steel metal pairs with mild steel wire.
- Stainless steel requires stainless steel wire.
- Aluminum metal needs aluminum wire.
Using the wrong wire weakens the weld and causes defects. Always check metal type before buying wire.
Wire Diameter Selection
Wire diameter affects weld penetration and stability. Common diameters include 0.023″, 0.030″, 0.035″, and 0.045″.
- Thin wire suits thin metal for delicate welds.
- Thicker wire fits thicker metal for strong joints.
- Smaller diameter wires produce less heat and spatter.
- Larger wires handle higher welding currents.
Select wire diameter based on metal thickness and welding power. Correct size improves weld control and quality.

Credit: wespec.net
Preparing Your Workspace
Preparing your workspace is a crucial part of wire welding that often gets overlooked. A well-organized and clean area not only makes the job easier but also improves the quality of your welds. Setting yourself up right from the start can save time and prevent accidents.
Cleaning The Metal Surface
Before you begin welding, make sure the metal surface is clean and free of rust, paint, or oil. Use a wire brush or grinder to remove any debris that could weaken the weld.
Think about the last time you welded on a dirty surface—did you notice weak spots or cracks? Cleaning ensures a strong bond and better conductivity.
Setting Up Welding Equipment
Arrange your welding machine, wire feeder, and gas supply close to your workspace for easy access. Check all cables and connections to avoid interruptions during welding.
Don’t forget to adjust the settings on your welder according to the thickness and type of metal. Proper setup means less frustration and smoother welding.
Safety Precautions
Welding involves high heat and sparks, so protect yourself with the right gear. Wear a welding helmet, gloves, and flame-resistant clothing to stay safe.
Keep a fire extinguisher nearby and clear your workspace of flammable materials. Have you prepared your area to handle unexpected sparks or spills?
Adjusting Machine Settings
Adjusting your wire weld machine settings is key to getting clean, strong welds. Each setting affects how the weld behaves, so tweaking them can make a big difference in your results. Getting these settings right means less rework and better quality every time you weld.
Voltage And Amperage Settings
Voltage controls the arc length, while amperage controls the heat output. Too high voltage can cause a wide, unstable arc, and too low can make the weld uneven. Amperage that’s too high burns through the metal; too low results in weak welds.
Try starting with manufacturer recommendations and adjust in small increments. Watch how the weld pool responds—does it flow smoothly or splash too much? Your goal is a steady arc with consistent penetration.
Wire Feed Speed
Wire feed speed determines how fast the filler wire is pushed into the weld pool. If the speed is too fast, you’ll get excessive spatter and poor control. Too slow, and the arc may sputter or even go out.
Match your wire feed speed to your voltage and amperage settings. A good rule is to increase speed gradually and observe the weld bead. Is it uniform and shiny? If not, tweak your feed speed until it is.
Gas Flow Rate
Gas flow rate protects your weld from contamination by shielding it with an inert gas. Too low a flow lets air in, causing porosity and weak spots. Too high a flow wastes gas and can create turbulence, also leading to poor weld quality.
Most setups recommend a flow rate between 15 and 25 cubic feet per hour (CFH). Use a flow meter and adjust based on your environment—windy conditions may need a slightly higher flow. Have you checked your gas flow recently? It’s often overlooked but critical for clean welds.
Mastering Welding Techniques
Mastering welding techniques is essential to produce strong, clean welds that last. The way you position your torch, control your speed, and maintain your arc can make all the difference in the final result. These skills take practice, but understanding the basics will boost your confidence and improve your work immediately.
Proper Welding Angle
Your welding angle affects how the molten metal flows and bonds. Holding the torch too steep or too flat can cause weak joints or excessive spatter.
A good rule is to keep the torch at about a 15-degree angle from vertical, pointing in the direction you’re welding. This angle helps the weld pool flow smoothly and ensures proper penetration.
Try adjusting your angle slightly during practice and observe how the weld changes. What angles give you the cleanest bead without undercutting or buildup?
Controlling Travel Speed
Travel speed determines how much heat you apply and how the weld bead forms. Moving too fast can cause poor fusion, while moving too slow can lead to burn-through or excessive buildup.
Find a steady pace where the weld pool stays consistent and evenly fills the joint. You can practice by welding beads on scrap metal and experimenting with different speeds.
Have you noticed how your speed affects the bead shape and strength? Small adjustments can create big improvements.
Maintaining Consistent Arc Length
The arc length is the distance between the welding tip and the workpiece. Keeping it steady controls the heat and the quality of the weld.
If the arc is too long, it can cause spatter and a weak weld. Too short, and the electrode may stick or cause excessive heat buildup.
Focus on keeping the arc length about the same as the diameter of your welding wire. This consistency helps produce smooth, uniform welds every time.
Common Welding Issues
Welding can be a rewarding skill, but it often comes with challenges that can affect the quality of your work. Understanding common welding issues helps you avoid costly mistakes and improves your overall results. Let’s explore some frequent problems and how you can handle them effectively.
Preventing Porosity
Porosity appears as tiny holes or cavities in the weld and weakens its strength. It usually happens when moisture, oil, or dirt contaminates the metal surface or welding wire.
Keep your materials clean and dry before starting. Use a wire brush or grinder to remove rust and oil, and store your wire in a dry container. Also, check your gas flow rate; too little shielding gas can let air in, causing porosity.
Avoiding Weld Spatter
Weld spatter are small droplets of molten metal that scatter around the weld area, making your project look messy and requiring extra cleanup. Spatter often happens due to incorrect voltage or wire feed speed.
Adjust your welding machine settings carefully. Lower the voltage or slow down the wire feed speed if you see excessive spatter. Using anti-spatter spray can help, but it’s better to get your settings right first.
Fixing Undercuts And Cracks
Undercuts are grooves along the weld edge that reduce strength, while cracks can lead to serious failure. Both are signs of improper technique or incorrect heat input.
To fix undercuts, slow your travel speed and maintain a steady hand. Avoid excessive heat, which can cause cracks. If cracks appear, grind out the damaged area and re-weld with the right settings and filler material.
Post-weld Practices
Post-weld practices ensure the strength and durability of your welds. Proper care after welding prevents defects and extends the life of the joint. These steps help maintain the quality of your work and prepare the weld for its intended use.
Cleaning And Inspecting Welds
Cleaning welds removes slag, spatter, and oxidation. Use a wire brush or grinder for smooth surfaces. Proper cleaning reveals any cracks or holes that need fixing. Inspect welds visually and with tools to check for defects. Look for uniform bead shape and proper penetration. Detecting problems early avoids costly repairs later.
Heat Treatment Options
Heat treatment improves weld strength and reduces stress. Common methods include annealing, normalizing, and stress relieving. Annealing softens the metal, making it easier to work with. Normalizing refines the grain structure and enhances toughness. Stress relieving removes residual stresses from welding. Choose the right heat treatment based on the metal type and application.
Storage Of Welding Materials
Store welding materials in a dry, clean place. Moisture can cause rust on electrodes and filler metals. Keep materials sealed in airtight containers or bags. Label storage areas to avoid mixing different types. Proper storage extends the shelf life and maintains material quality. Check materials regularly for signs of damage or contamination.

Credit: www.mdpi.com
Frequently Asked Questions
What Equipment Is Needed To Wire Weld Safely?
You need a wire feeder, welding gun, ground clamp, power source, and protective gear. Ensure all equipment is in good condition before starting. Safety glasses and gloves are essential to protect yourself during wire welding.
How Do I Prepare Metal For Wire Welding?
Clean the metal surface of rust, paint, and dirt. Use a wire brush or grinder for smoothness. Proper preparation ensures better weld quality and stronger joints.
What Settings Are Ideal For Wire Welding?
Set the wire feed speed and voltage according to metal thickness. Refer to the welding machine’s manual for precise settings. Correct settings prevent defects and ensure a stable weld.
Can Beginners Learn Wire Welding Easily?
Yes, wire welding is beginner-friendly with practice and proper guidance. Start with simple projects and focus on steady hand movement. Consistent practice improves skill and confidence.
Conclusion
Learning to wire weld takes practice and patience. Start with the basics. Focus on safety, as it’s crucial. Wear protective gear every time. Choose the right equipment for your needs. Clean surfaces ensure strong welds. Practice makes perfect, so keep trying.
Follow step-by-step instructions for better results. Don’t rush; take your time. Understand common problems to avoid mistakes. Joining a community can offer support and tips. Keep learning and improving your skills. Wire welding can be a rewarding skill to learn.
Stay dedicated and enjoy the process. Happy welding!
