
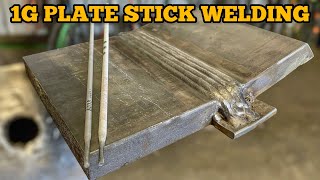
Welding with a stick welder might seem tricky at first, but once you get the hang of it, you’ll find it’s a powerful skill to have. Whether you’re fixing metal parts, working on a project, or just want to try something new, this guide will help you master the basics quickly.
You’ll learn simple steps that make welding safer and more effective, so you can see real results fast. Ready to turn sparks into strong, lasting welds? Keep reading, and you’ll discover how easy it can be to weld with a stick welder like a pro.
Stick Welding Basics
Stick welding is a popular and simple welding method used by many beginners and professionals. It uses a consumable electrode coated with flux. The flux creates a protective gas and slag to shield the weld from contamination. This method works well outdoors and on dirty or rusty metals. Understanding the basics helps ensure strong, clean welds.
What Is Stick Welding
Stick welding, also called Shielded Metal Arc Welding (SMAW), uses an electric current to melt the electrode and base metal. The electrode melts and fuses with the metal, forming a strong joint. The flux coating melts and protects the weld from air contamination. This process works on various metals like steel, iron, and cast iron.
Essential Equipment
- Stick welder power source to supply electricity
- Electrodes or welding rods with flux coating
- Electrode holder to grip the rod
- Ground clamp to complete the electric circuit
- Protective welding helmet with a dark lens
- Welding gloves and flame-resistant clothing
- Wire brush and chipping hammer for cleaning welds
Safety Precautions
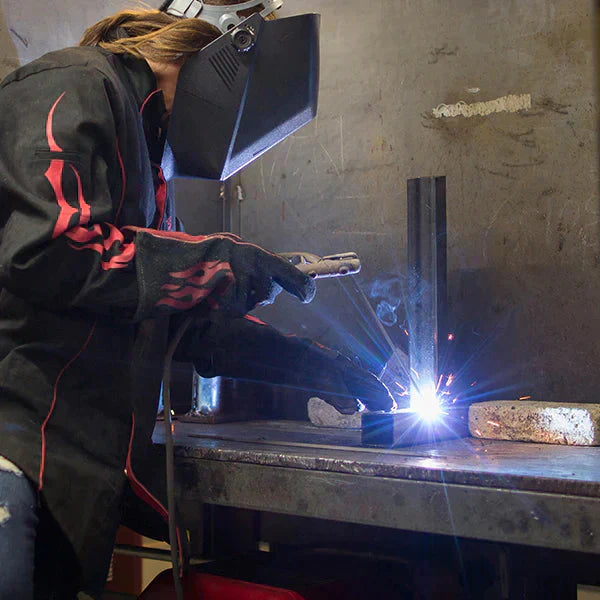
Wear a welding helmet to protect eyes from bright light. Use gloves and long sleeves to avoid burns and sparks. Work in a well-ventilated area to reduce harmful fumes. Keep flammable materials away from the welding zone. Always check equipment for damage before starting. Follow safety rules strictly to prevent injuries.
Credit: yeswelder.com
Preparing For Welding
Preparing for welding is a crucial stage that sets the foundation for a strong, clean weld. Taking time to get everything right before striking the arc saves you from common mistakes and frustration. Your focus here should be on selecting the right materials, setting your equipment correctly, and ensuring your workpiece is ready to join.
Choosing The Right Electrode
Picking the correct electrode affects the quality and strength of your weld. Different electrodes suit various metals and welding positions. For example, an E6011 electrode works well for dirty or rusty metals, while an E7018 electrode is great for clean, structural steel.
Think about the thickness of your metal and the type of weld you want to create. Using the wrong electrode can cause weak welds or excessive spatter. Have you ever tried welding with an electrode that just didn’t seem to stick? That’s a sign you need to switch to a better match.
Setting Up The Welder
Correct settings on your stick welder make a huge difference. Adjust the amperage according to the electrode size—too low and you’ll get poor penetration, too high and you risk burning through the metal. Most electrodes have recommended amperage ranges printed on the packaging.
Don’t forget to check your ground clamp connection. A loose or dirty ground can cause unstable arcs and poor weld quality. Make sure your cables are in good shape and your welder is on a stable surface to avoid interruptions during the process.
Preparing The Workpiece
Clean your metal before welding. Remove paint, rust, oil, or dirt with a wire brush or grinder. Even small amounts of contamination can cause weak welds and spatter.
Clamp your pieces firmly to prevent movement while welding. Gaps and misalignment can cause defects or require you to redo the work. Have you noticed how a shaky joint can turn a perfect weld into a disaster? Proper preparation avoids that.
Welding Techniques
Stick welding uses an electrode to create a strong bond between metals. Maintaining a steady hand and correct angle ensures a clean weld. Proper safety gear is essential to protect from sparks and heat.
Welding techniques are the backbone of mastering the art of stick welding. They involve understanding and applying specific methods to achieve strong and clean welds. Whether you’re a beginner or have some experience, refining your techniques can significantly improve your welding results. Let’s dive into some crucial aspects of welding with a stick welder.Striking The Arc
Striking the arc is your starting point in welding. It’s all about creating a connection between the electrode and the metal surface. Imagine trying to light a match; the initial strike may be tricky, but with practice, it becomes second nature. To strike the arc, gently tap the electrode on the metal and quickly lift it. This action initiates the electrical circuit needed for welding. If the arc doesn’t ignite immediately, don’t get frustrated. Adjust your angle or pressure slightly and try again. A smooth start sets the tone for your entire weld.Maintaining The Arc Length
Arc length can make or break your weld quality. Think of it as the distance between the electrode tip and the workpiece. Too close, and you risk sticking the electrode; too far, and the arc becomes unstable. The ideal arc length is roughly equal to the diameter of the electrode. Maintaining this consistency demands a steady hand and focused attention. You might find your arc length fluctuating initially, but with practice, you’ll learn to keep it steady. Consider using your welding helmet’s auto-darkening feature to maintain visibility while adjusting your arc.Controlling The Weld Pool
The weld pool is the molten metal that forms during welding. Controlling it is crucial for achieving a clean weld bead. Picture the weld pool as a tiny lava lake; it’s fluid, hot, and needs careful management. You control the weld pool by adjusting your travel speed and electrode angle. A slower speed allows the pool to spread, while a faster pace narrows it. Experiment with different speeds to see how the weld pool reacts. Keeping an eye on the pool’s size and shape helps you create consistent and strong welds.Common Welding Positions
Welding positions can vary greatly, influencing how you approach your task. Each position requires distinct strategies and adaptations. The main positions are flat, horizontal, vertical, and overhead. In flat welding, gravity works in your favor, making it the easiest position. Horizontal welding requires careful control to prevent the weld from sagging. Vertical welding challenges you to manage the molten pool as it flows down. Overhead welding demands precision, as gravity pulls the pool away from the joint. Each position presents unique challenges, but they also offer opportunities to refine your skills. Have you ever found yourself struggling with a particular position? Consider adjusting your stance or electrode angle to improve your results. By focusing on these techniques, you’ll build a solid foundation in stick welding. Each practice session brings you closer to mastering these skills and achieving impressive welds.
Credit: www.tiktok.com
Tips For Strong Welds
Strong welds need careful attention to a few key details. These tips help improve the quality and durability of your stick welding projects. Focusing on heat, speed, angle, and common pitfalls leads to better results every time.
Managing Heat And Speed
Too much heat can burn through the metal. Too little heat causes weak joints. Adjust the welder’s current to match the metal thickness. Move the electrode at a steady, consistent speed. Slow movement may cause excess buildup. Fast movement can leave gaps. Find a balance that creates a smooth, even bead.
Avoiding Common Defects
Weld defects weaken the joint and cause failure. Watch out for cracks, porosity, and slag inclusion. Cracks form from rapid cooling or too much heat. Porosity happens when gases get trapped in the weld. Slag inclusion occurs if you don’t clean the weld between passes. Clean the surface before welding. Use proper welding techniques to reduce defects. Inspect each weld for flaws and fix them promptly.
Proper Electrode Angle
Hold the electrode at the right angle for good penetration. A 15-degree angle from vertical works well in most cases. Keep the angle steady as you move along the joint. Too steep or too flat angles lead to poor fusion. Adjust the angle slightly for different weld positions. Practice steady hand control to maintain the angle throughout the weld.
Post-weld Practices
Post-weld practices are essential to ensure the strength and appearance of your weld. After welding, the workpiece needs proper attention. This step keeps your weld safe from damage and improves its quality.
Cleaning The Weld
Cleaning removes slag and debris from the weld surface. Use a chipping hammer to break off slag. Then, a wire brush clears leftover particles. Cleaning helps reveal the weld’s true condition. It also prevents rust and corrosion over time.
Inspecting For Flaws
Check the weld for cracks, holes, or uneven beads. A good weld looks smooth and consistent. Look closely at the edges for gaps or weak spots. Use proper lighting and magnification if needed. Catching flaws early avoids costly repairs later.
Grinding And Finishing
Grinding smooths rough areas and sharp edges. Use an angle grinder with a suitable disc for metal. Grind gently to keep weld strength intact. Finishing improves the weld’s appearance and prepares it for painting or coating. Always wear safety gear during grinding.

Credit: www.tiktok.com
Troubleshooting
Troubleshooting your stick welding process is key to producing strong, clean welds. Problems like porosity, cracks, and slag can ruin your work if not addressed quickly. Understanding how to fix these issues will save time and improve the quality of your welding projects.
Dealing With Porosity
Porosity appears as tiny holes or bubbles in the weld, weakening its strength. It usually happens when moisture, dirt, or rust contaminates the metal or electrode. Always clean the metal surface thoroughly before welding and store your electrodes in a dry place.
If you notice porosity, slow down your travel speed. Moving too fast traps gas in the weld pool, causing bubbles. Adjust your angle to maintain a steady arc and prevent air from mixing with molten metal.
Fixing Cracks
Cracks are serious because they can cause the weld to fail under stress. They often occur from rapid cooling or welding on dirty or brittle materials. Preheat thicker metals to reduce the risk and choose the right electrode for the job.
If a crack appears, stop welding and grind out the affected area completely. Then, weld again using a slower speed and smaller passes to allow the metal to cool evenly. How often do you inspect your welds for early signs of cracking?
Handling Slag Issues
Slag is the residue left on top of the weld bead. If you don’t remove it properly before the next pass, it can cause poor fusion and weak spots. Use a wire brush or chipping hammer to clear slag between passes.
Too much slag may mean you’re using the wrong electrode or welding at incorrect amperage. Try adjusting the current and check the electrode specifications. Have you tried different electrodes to see which produces the cleanest weld for your material?
Frequently Asked Questions
What Safety Gear Is Essential For Stick Welding?
Wearing a welding helmet, gloves, and flame-resistant clothing is crucial. Safety glasses and ear protection prevent injuries from sparks and noise. Proper ventilation avoids inhaling harmful fumes. Always check your gear before starting to ensure maximum protection during stick welding.
How Do I Set The Right Amperage For Welding?
Match the amperage to electrode size and metal thickness. Higher amperage suits thicker metals and bigger electrodes. Start with the manufacturer’s recommended settings, then adjust for a steady arc and smooth weld. Proper amperage ensures strong, clean welds without damage.
What Type Of Electrode Is Best For Beginners?
E6011 and E6013 electrodes are ideal for beginners. They offer easy arc starting and smooth welds on various metals. These rods tolerate rust and dirt well, making them perfect for practice and general-purpose welding projects.
How To Maintain A Stable Arc During Welding?
Keep a consistent electrode angle and distance from the workpiece. Hold the electrode steady and move at a uniform speed. Avoid excessive gaps or contact with the metal. A stable arc ensures better penetration and cleaner weld beads.
Conclusion
Welding with a stick welder takes practice and patience. Start with the basics and keep your work steady. Remember to wear safety gear every time you weld. Small mistakes help you learn and improve faster. Try different rods and settings to find what works best.
Stay calm and focused during each weld. Soon, you will weld stronger and cleaner joints. Keep practicing, and welding will become easier and more fun. Stick welding can open many project possibilities for you. Keep at it, and enjoy the process!
About The Author

